Payments button
Our easy to use guide will get you up and running in no time!
Easily add a customisable Payment Button to your website to accept once-off and recurring payments with the Netcash Payment Gateway. It’s the ideal solution for accepting donations, making sales, or selling services on your website. Simply log into your Netcash account, and let the auto code generator do the rest, giving you an HTML-based Payment Button that’s fully adaptable to your needs.
Key Features:
- HTML-Based: Simple and easy to implement on any website.
- Fixed or Variable Amounts: Choose between a fixed amount (e.g. R50 donation) or allow customers to input their desired amount.
- Once-off or recurring payments: Customise the button within an HTML form to accept once-off or subscription payments.
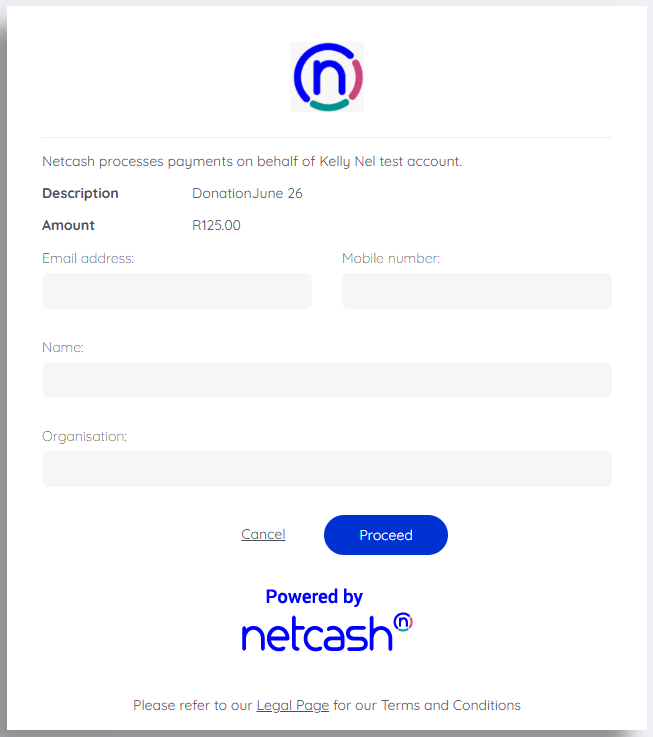
- Seamless integration: Customers are automatically redirected to the secure Netcash Payment Gateway to make payment instantly.
Your customers can pay using various payment methods

Create a payment button – Once-off transactions
Navigate to Services > Pay Now > Payment request > Payment button.
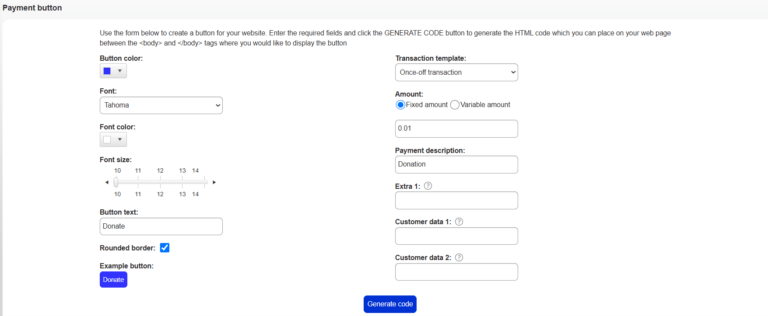
Starting from the left of the screen : Customising the payment button.
- Button colour: select the colour of your button
- Font: Select the font to appear on your payments button
- Font size: Select the font size
- Button text: Insert the text that you would like to appear on your button
Rounder border: select either a round button or opt for a square shape. Untick the box for a square shape button - Example Button: Displays how your button will appear
- Transaction template: Select you template if a subscription is to be applied to the payment button. To be explained in more detail in the next section
- Choose a fixed or Variable amount. The variable amount option allows your customer to choose the amount to be donated. For the fixed amount option insert the amount in the box below
- Insert Payment description – this is the text that appears on the payment page when your customer are paying and describes the nature of the payment.
- Extra fields are used to allow for easy reconciliation and will appear on your Netcash statement, for example, a project name, region or donation type.
- Extra 1: Information to be displayed on your Netcash statement – not visible to payer (Max 999 characters)
- Customer data 1 and 2: If populated, creates an input box on the payments page which can be used for referencing on the Netcash statement (Max 49 characters) The reference field description is visible to payer and allows for the payer to capture additional referencing/information.
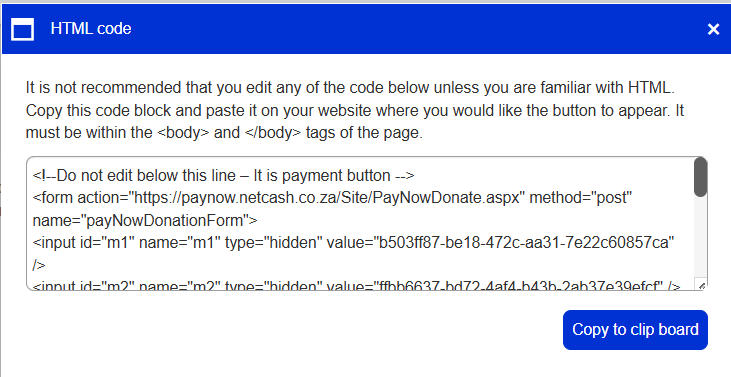
- Click the generate code button.
- In the popup window click on Copy to clipboard.
- Copy the code, and paste it into your website HTML editor where you would like the button to appear.
Note: You can create as many Payment Buttons as you like, all set up for different amounts or transaction types, to suit your needs.
You may decide which of payment methods to offer to your customers.View your Pay Now Netconnector settings in your Netcash account to adjust your payment methods. Payment requests are sent once on the day that the unpaids are received from the various banks
Create a payment button -Subscriptions
Select an existing subscription template in your Netcash account, customise the font size, text colour, and button colour for your payment button and then generate the HTML code so it can be embedded anywhere on your website. The payment will be accompanied by a subscription based on your subscription terms in the template.
Creating a Subscription template.
Navigate to Services > PayNow> Card subscriptions> templates.
- Click on Add Template
- Insert a template name.
- Select your Subscription frequency: Monthly |Weekly | Biweekly, etc
- Number of collections – the number of times the credit card must be debited, or select
- Infinite collections, if applicable.
Note:
When setting up a subscription, keep the initial transaction in mind when calculating the total number of collections.
If you choose to include the initial transaction as the first payment, the remaining collections must be adjusted accordingly.
Example:
For an annual subscription with 12 payments:
Initial transaction counts as payment 1
Remaining collections = 11 payments
This ensures the total number of payments aligns with your intended billing cycle.
- Subscription amount
- Select Active if the template is to be used; alternatively, a template can be made inactive if not in use and reactivated when in use.
- Click on submit
- Your template has now been created and can be linked to either a payment request or a payment button. These steps will be discussed next in the guide.
Payment button linked to a Subscription template:
Choose any existing subscription template in your Netcash account, select font size, colour, and button colour, and generate HTML code to place anywhere on their website.
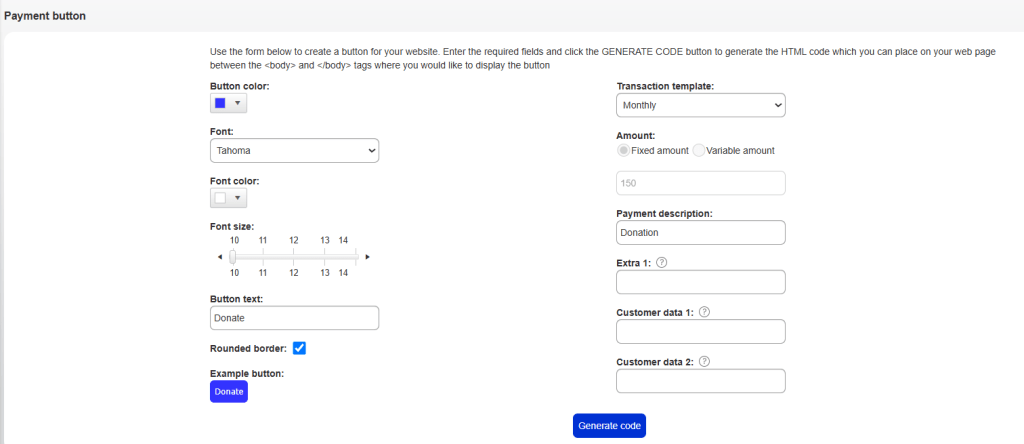
Navigate to Services > Pay Now > Payment button
- Select one of your subscription templates from the right-hand side drop down menu. The amount will default to the subscription template amount.
- Insert Payment description – this is the text that appears on the payment page when your customer are paying and describes the nature of the payment.
- Choose your button colour, font colour and font size. Rounded borders are also possible.
- Note that the Demo button displays a preview of the button.
- Insert custom button or font colours if required.
- Extra fields are used to allow for easy reconciliation and will appear on your Netcash statement, for example, a project name, region or donation type.
- Extra 1: Information to be displayed on your Netcash statement – not visible to payer (Max 999 characters)
- Customer data 1 and 2: If populated, creates an input box on the payments page which can be used for referencing on the Netcash statement (Max 49 characters) The reference field description is visible to payer and allows for the payer to capture additional referencing/information.
- Click the generate code button.
In the popup window click on Copy to clipboard. - Copy the code, and paste it into your website HTML editor where you would like the button to appear.
Example of the payment gateway with subscription
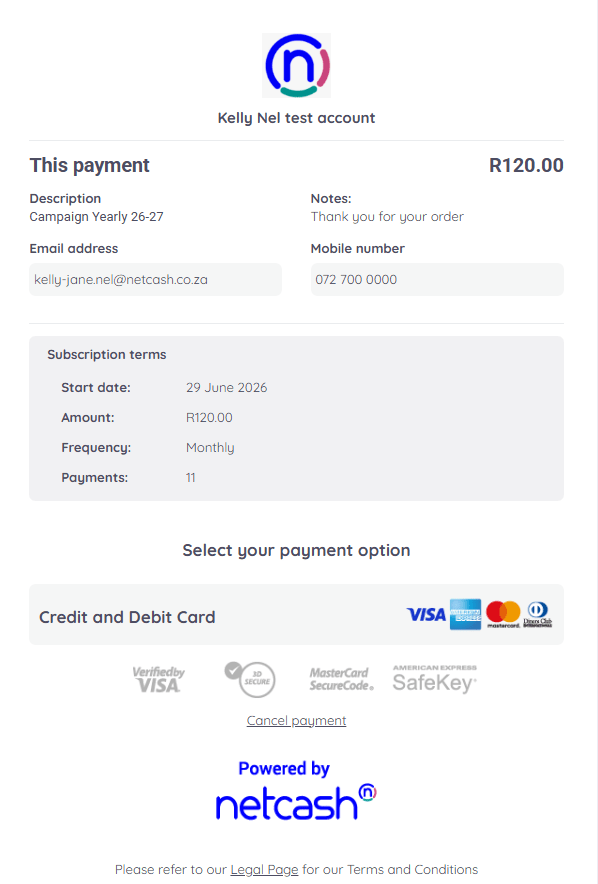
View demo
Reports
Once the transaction has been completed, it can be viewed under Pay Now Reports> Processed Transactions.
