Salary Payments QSG
Understanding your salary payments profile on your Netcash account
The Salary payment profile displays information relating to your limits, authorises and fees.
These payment limits can be increased by you if you have permission to do so.
Select Account profile > Click Service profiles > Select Salary payments.
- Service active: This would be ticked if the service is active.
- Line limit: This would reflect the amount of your line limit/you are per transaction limit.
- Batch limit: This would reflect the amount of your batch limit/ this would be your daily limit.
- Number of authorisers: This would reflect how many authorises you have requested; you can have multiple authorises should your business require it.
- Fees are displayed per service.
- Click the blue Edit button to increase or decrease your line or batch limit.
- Once you have clicked the blue Edit button and made your change you will receive an OTP.
- Enter the OTP and Submit.
Our easy to use guide will get you up and running in no time!
Login
Navigate to Netcash
Enter your Username, password and Pin
Services Keys
The View salary payments service key settings, allow you to generate your service keys. If it has already been generated you are able to view it here. You are also able to edit the email address or deactivate the service key.
- Click on Account profile.
- Click on NetConnector > Salary payments.
- Complete the required fields.
- Tick the postback URL active box if required.
- Select the pre-defined postback URL if your software appears in the dropdown list – or
- Insert the postback URL where the responses should be electronically sent.
- Choose from the following options: Ignore errors, Auto forward action date or Lock batch on upload. (See notes below for detail).
- Click on the Submit button.
- The service key is generated and emailed to the email address linked to the service key. The service key may be interested into the relevant ISV software if applicable.
Note:
Select Ignore errors if you would like Netcash to process payments to valid bank accounts and ignore invalid bank accounts. Leaving this option unticked will result in all payments rejecting if any one payment is invalid.
Auto forward action date will move your payments to the next valid action date if you have missed your cutoff time.
Lock batch on upload will not allow any editing of supplier details once the supplier batch is sent to Netcash.
Loading employees
- Click on Services.
- Select Payments from the dropdown menu.
- Click on Salaries > Manage Employees list.
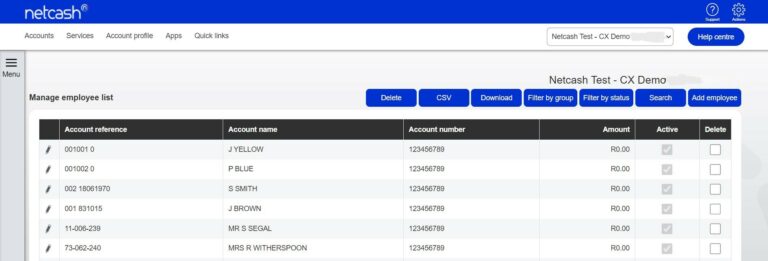
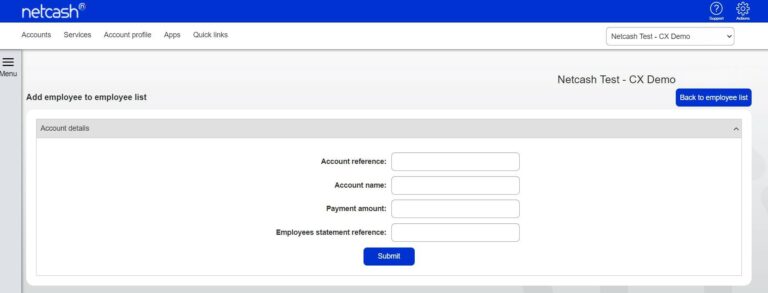
- Click the Add employee button on the top right side of the screen.
- You will be prompted to insert the following information:
- Account reference
- Account name
- Payment amount
- Employee statement reference
- Click on Submit.
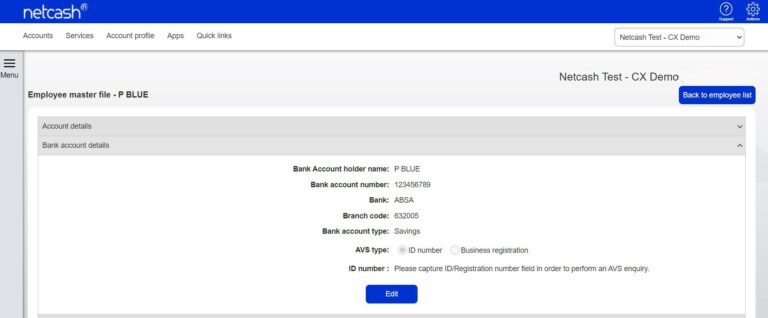
- To add the employee’s banking details, click on Bank account details below the Account details.
- You will be prompted to insert the following information:
- Bank account name
- Bank account number
- Branch Code
- Bank account type
- Click on Submit.
- Bank account details will be validated before saving.
- Other optional fields to store salary information include:
- Account grouping
- Notifications
- Transaction history
- Contact details
- Additional details
- Employee notes
Adding a salary batch
Funds must be available in your Netcash account in order to authorise your batch.
Salary Payment types and cut off times:
Sameday batches that are in an authorised status on the action date may no longer be unauthorised.
Example:
Sameday batch for action date 29th May can be unauthorised up and until midnight on the 28 May. (Business days only)
Dated batches can only be unauthorised on the business day prior to the cut off date.
Example
Dated batch for action date 29th May can be unauthorised up and until midnight on the 27 May. (Business days only)
Same day Salary Payments batch
- Funds will be available in the beneficiaries bank account the next day, value-dated for the same day as, payment date.
- The processing cut-off time is 13h00 on the payment day.
- Valid payment dates are Monday to Friday (excluding public holidays).
- Funds must be available in your Netcash account prior to authorising your batch
Dated Salary Payments batch
- All payments are reflected in all accounts on the payment day.
- Processing cut-off time is 13h00 one business day before payment day and 13h00 on Friday for Saturday and Monday’s batches.
- Valid payment dates are Monday to Saturday (excluding public holidays).
- Funds must be available in your Netcash account prior to authorising your batch.
Real Time Clearing payments (RTC)
Batch authorisation schedules:
Monday to Friday:
- 08h30 to 15h30 on the payment day for transaction values up to R5 000 000.
- 15h30 to 16h30 on the payment day for transaction values up to R250,000.
RTC batches are not available, on weekends or public holidays
Funds must be available in your Netcash account prior to authorisation of the batch.
- Click on Services.
- Select Payments from the dropdown menu.
- Click on Salaries > Salary batches.
- Click on the blue Add salary batch button.

Select the Payment type* and Action date.
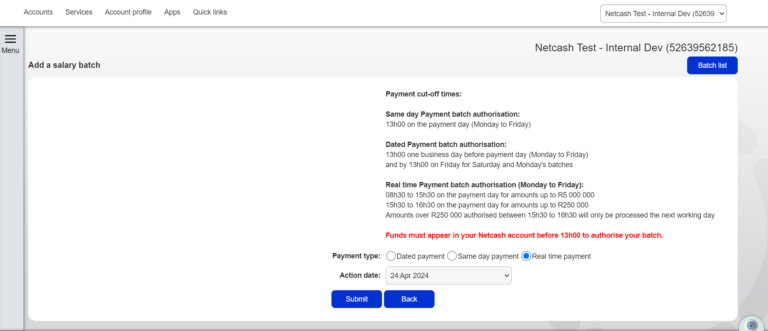
- Click Submit.
- You may now select employees to be added to your batch.
- Insert the employees to be paid by selecting the text box to the right of the employee record.
- Insert the salary amounts and change the Statement reference if required.
- Click on the Add Selected to batch button.
- Click on View batch.

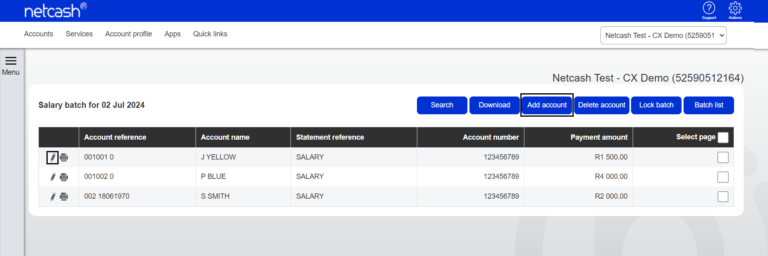
Editing a salary batch
- To add employees to an existing salary batch, click Edit Employees on the left side of the Salary Batches table.
- Click on the Add account to the batch button.
- Select the employees to be paid by ticking the text box to the right of the employee record.
- Insert the salary amounts and change the Statement reference if required.
- Click on the Add Selected to batch button.
- Click on View batch.
Lock batch
To lock a batch from any further editing select the edit icon and click on Lock batch.
Review the onscreen message and click on Yes if you would like to proceed. Please note that the batch cannot be unlocked.
The lock batch feature is applicable to all batches created on the Netcash platform. Imported batches may have the lock batch feature activated in the NetConnector settings, in which case they will already be locked

Downloading a pre-authorisation report
- Click on Services.
- Click on Payments from the dropdown menu.
- Click on Salaries > Salary batches.
- The list of salary batches will now be displayed.

- To download your Pre-Authorisation Report, select Edit Employees on the left side of the Salary Batches table.
- Click on the Download button.
- Your salary batch report will be displayed on the screen. Click on the Export icon and select your preferred format to download your report.
- The batch will automatically start downloading and save in your default downloads folder.
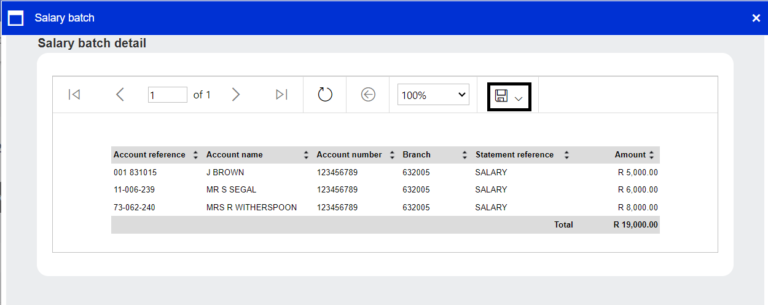
Viewing a batch detail report
Navigate to Services > Payments > Salaries > Salary batches.
Select view batch detail report (left hand side page icon)
The batch detail report displays information regarding batch details prior to the batch being processed by the bank.
Important fields to note:
- Batch value
- Authorised by
- Authorised date
- Action date
- Recommended deposit
Authorising a salary batch
- Click on Services.
- Click on Payments from the dropdown menu.
- Click on Salaries > Salary batches. The list of salary batches will be displayed.
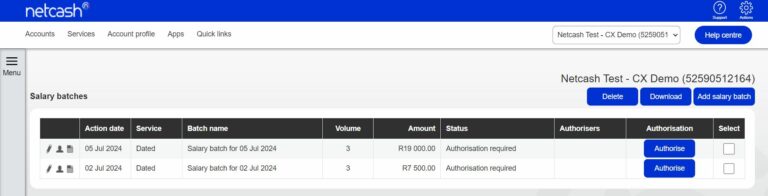
Click on Authorise next to the batch that you would like to process.
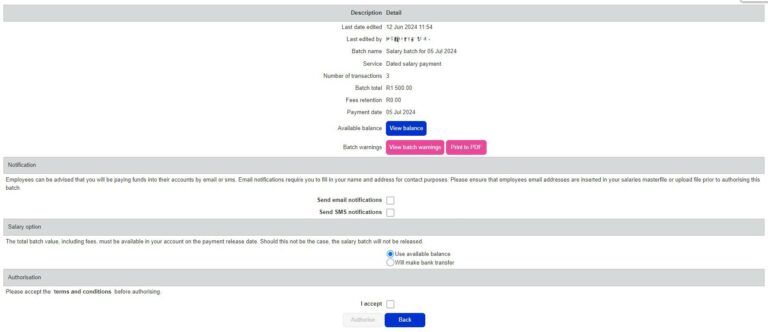
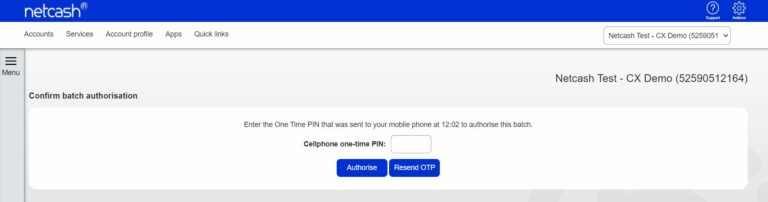
The confirm batch authorisation screen is displayed. This is a summary of the salary batch including charges, notifications and choice of funding options.
Batch warnings -A batch warning button displayed in pink indicates warnings in the batch. Batch warnings will display info in the batch such as duplicate bank accounts and account details changed. You can choose to make corrections or proceed to authorise the batch without amendments
Pay against the available balance if there is sufficient credit in your Netcash account.
Transfer funds if you need to fund the Netcash clearing account for payment
Read and accept the terms and conditions, then select Authorise.
Should you select to pay using the Available balance option you will then be re-directed to the Confirm batch authorisations screen.
Insert the One Time Pin (OTP) sent to your cell number or Google Authenticator pin.
Click OK.
Your Salary Batch is now authorised and will be scheduled to run on the selected date.
If you require additional authorises, the batch will be awaiting further authorisation. Please inform the additional authorisers of this.
6. If you are paying using the Will Make bank transfer option, you will be prompted to insert the following information:
- The date when the transfer will be made.
- The Netcash account you will be transferring to.
- The amount to be transferred.
- The extra fields are optional for reconciliation purposes.
7. Click Next.
8. Click on a Print Report to obtain details of the Netcash clearing that you need to fund.
9. To view the Netcash clearing account details in your Netcash account: Navigate to Services > Account> Manage Account> Netcash clearing accounts.
- Please ensure your Netcash account number is used as the reference.
10. Click Authorise to confirm your bank transfer.
11. Insert the One Time Pin (OTP) sent to your cell number or Google Authenticator pin and click Authorise.
12. Your salary batch is now authorised and will be scheduled to run on the selected date.
13. If you require additional authorises, the batch will be awaiting further authorisation – please inform the additional authorisers of this.
Notes: One Time Pins are session-based, which means that as long as you are logged in to your Netcash account, you can use the same OTP to authorise. Where multiple authorisations are required, only the first authoriser needs to insert the OTP.
If you have exceeded your line or batch limit, please contact Netcash to arrange a limit increase or click on the increase limit button during the batch authorisation process, your Relationship Consultant will contact you. If you have permission to increase the limits on the Netcash account, then please follow the below steps:
- Select Account Profile.
- Click on Service profiles.
- Select Salary payments.
- Click on the blue Edit button.
- Adjust your limits accordingly and submit.
- You will receive an OTP to authorise the change.
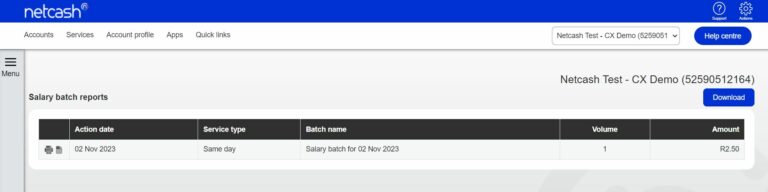
Downloading your post batch processing report
- Click on Services.
- Select Payments from the dropdown menu.
- Click on Salaries > Salary batch reports.
- Click on the Printer icon on the left of the batch.
Click on the Export icon and select your preferred format to download your report.
The batch will automatically start downloading and save in your default downloads folder.
For more detailed information regarding salary payments click on Read more
