Pay Now QSG
With multiple payment solutions, you can select the best methods for your business. Receive payments via bill presentation, mobile, online and in-store displays.
- Billing: With our Billing solutions, you can offer your customers a choice of convenient, at-a-click payment methods. This will help you to get paid faster, improve cash flow and reduce admin. When paying is this easy, you don’t have to ask twice.
- eCommerce: Selling online is made simple because your Netcash account is already integrated into a number of free shopping cart plugins that can be downloaded from our website. We also support customised integration.
-
Payment Request: Simply request a payment from anyone with a smartphone, or email address or follow up on your unpaid debit orders. Payment Request enables you to accept online payments via our secure link sent in an SMS or email. Alternatively, present a QR code for payment by using our Netcash Mobile App.
- Payment button: Easily add a customisable Payment Button to your website to accept once-off and recurring payments with the Netcash Payment Gateway. It’s the ideal solution for accepting donations, making sales, or selling services on your website. Simply log into your Netcash account, and let the auto code generator do the rest, giving you an HTML-based Payment Button that’s fully adaptable to your needs
- Scan to Pay: QR payments allow contactless payments to be made directly to your Netcash account by scanning a fixed code that is displayed at your business or on your smartphone. Confirmation of payment is sent to you via email / SMS.
- Subscriptions: A card subscription is a payment setup where your customer’s card is automatically charged on a recurring basis (e.g. monthly or annually).This is commonly used for: Subscriptions, memberships and ongoing services
- Split payments: Reduce admin and streamline your payment operations with Split Payments. The ideal solution for commission-based sales, eventing, wholesale and affiliate agreements, with Split Payments you can instantly split out a portion of your sales to a third party. Split Payments, between Netcash accounts, are available to use with almost all
Our easy to use guide will get you up and running in no time!
Issuing a Service Key
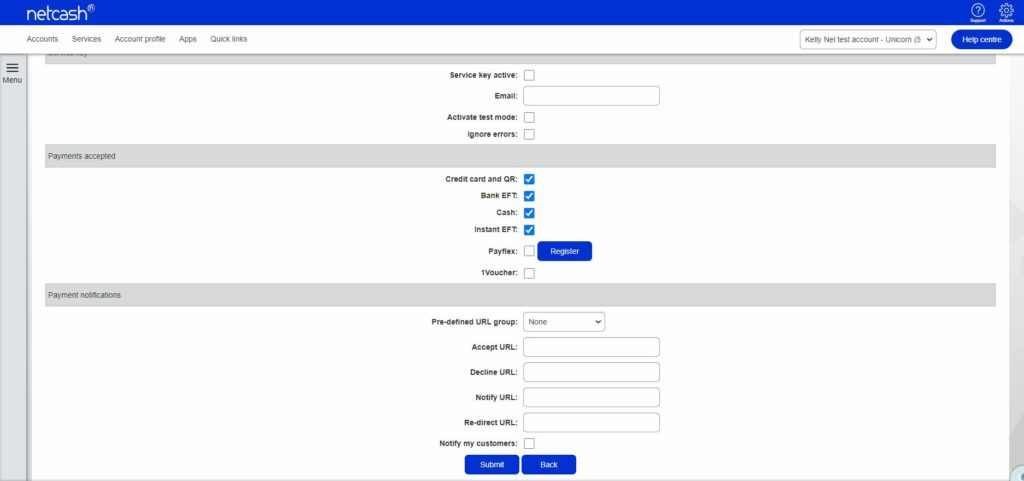
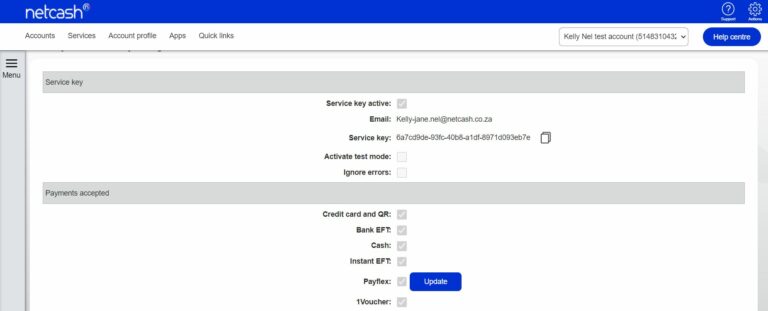
The Pay Now service key settings allow you to generate your service key if this is required. If it has already been generated, you are able to view it here. You are also able to edit the email address or deactivate the service key. This section also allows you to view or edit certain payment methods that are accepted. Your URLs can also be edited at this point.
- Navigate to Account profile.
- Click on NetConnector > Pay Now.
- Select the Service key active box.
- Insert the email address to which you would like reports and notifications to be sent.
- Select Activate test mode if you wish to test credit cards only (no transactions will be processed in test mode).
- Select the payment methods that you would like to be displayed to your customers.

Note: Credit card payments
Netcash accepts Visa and Mastercard by default. American Express and Diners Club international are available on request as these cards incur additional fees. To find out more about the fees or to activate American Express and or Diners Club international please contact your Account Manager.
- To deactivate a payment method, click on the Edit button and deselect the payment method.
- By selecting a predefined URL group, Netcash will automatically insert default URLs or follow the steps below.
- Insert Accept, Decline and Notify URLs for credit cards.
- Insert Notify and Redirect URLs for EFT and Retail.
- Select Notify my customers if you would like Netcash to email your customers when payment is received.
- Click on Submit.
Your service key will now appear below your email address and will be emailed to the specified address. The key may now be inserted into the relevant software.

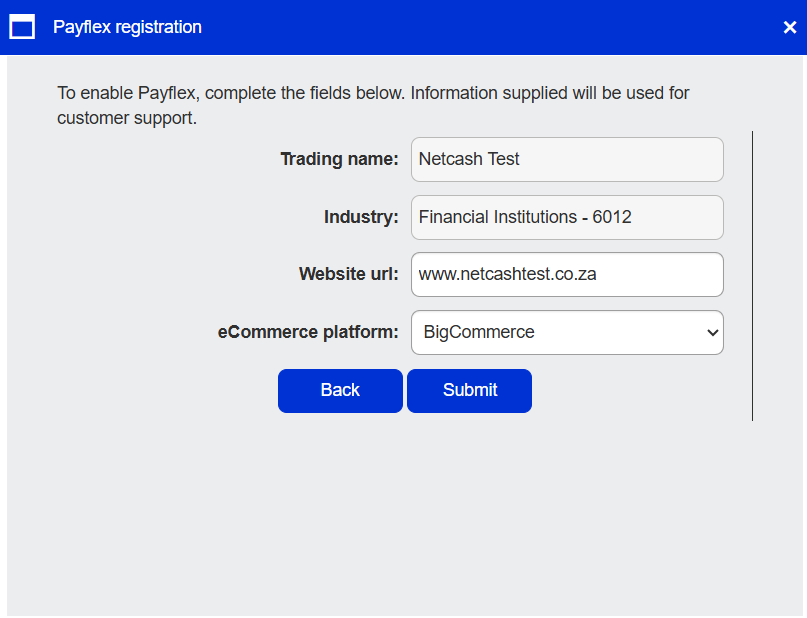
Payflex Registration
Registering for Payflex as a payment method allows your customers access to the Payflex payment option on the Netcash gateway. Payflex provides your customer with the ability to Buy Now and Pay Later in 4 or 3 interest-free instalments.
- Click on the Register button.
- Enter the required fields for the Payflex registration. (Trading Name and Industry will automatically be prepopulated)
- Click on the Submit button.
Payflex is now active and enabled as a payment method for your customers to utilise. Payflex transactions can be viewed under the Pay Now reports> Processed Transactions.
Testing Payflex
If you would like to test how Payflex works on your Netcash Payment Gateway, you can do so up to a maximum value of R200 per transaction.
Note: Any transaction greater than R200 processed by a Netcash client via their own payment gateway account will trigger a fraud flag with Payflex, and could result in your account being suspended.
Testing Payflex and other payment options on Live will allow you to experience the full payments process as your customers would, including settling funds to your Netcash account. Alternatively, put the payment gateway into Test mode in NetConnector if you’d like to run test transactions only.
Viewing your statement and releasing funds to your bank account
Quick steps to view your statement
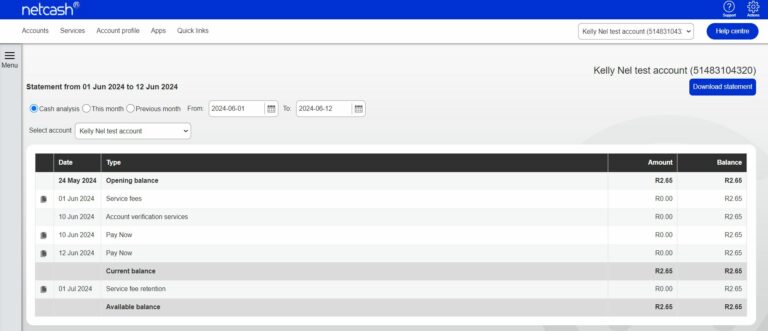
Your statement allows you to see all the transactional activity that has been processed through your Netcash account, such as batches processed, Pay Now transactions, AVS transactions, deposits, bank transfers, service fee retention, etc.
- Select Services.
- Click on Account from the dropdown menu.
- Click on Reports > Statement.
- Choose the statement you would like to view from the available options:
- Cash analysis
- This month
- Previous month
- Date range
- Download the statement by clicking the Download statement button. There are various formats available to save the download such as PDF, Excel etc.
Note: The Available balance is what is available to be transferred out of your Netcash account to your bank account. Service fees and retentions are included in the Available balance calculation.
To view the individual transaction details per statement entry, click on the view report icon.
The report may be downloaded in PDF, Excel etc.
Service Fees
These are pre-determined and agreed fees for transactions processed on your behalf on the Netcash system. Service fees are accumulated during the course of the month and reflect as a retention amount. Service fees are held as a negative amount in retention and invoiced on the 1st of following month.
Note: Pay Now transactions are consolidated by date and type. Click on the Printer to the left of the entry to get a breakdown of transactions.
Request release funds
The release funds option allows you to release your available funds that are in your Netcash account into your bank account that is linked to your Netcash account
- Select Services
- Click on Account from the dropdown menu
- Click on Manage account > Request release funds
- Click on the Release funds button
- Your available balance is displayed
- Select Release all available funds or Release own amount
- Click on the Release funds button
- Funds are released to your bank account linked to your Netcash profile
Note:
- The amount available for release is finalized after 13h00 on the day of release.
- Funds will be available in your bank account the next day and will reflect the date on which the release was requested
- Authorisation cut-off time is 14h30 on the payment day.
- Valid payment dates are Monday to Friday (excluding public holidays)
Release funds history
- Select Services.
- Click on Account from the dropdown menu.
- Click on Manage account > Release funds history.
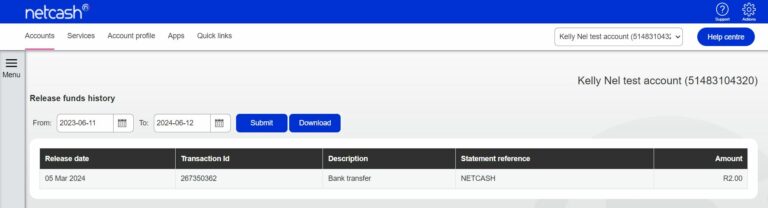
Note: Netcash will release the requested amount if sufficient funds are available at the time of processing.
Testing Credit Card payments
- Ensure that you have issued a Pay Now service key, and tick the ‘Activate Test mode now’ checkbox.
- Under the Payments accepted container, ensure that credit cards are active.
- When accessing the Netcash Gateway, click on the credit card button and enter card details on the front and back of the card, you can make use of the following test data: 4000000000000002 – Returns “Approved” 4000000000000028 – Returns VISA “Declined” 5200000000000049 – Returns MasterCard “Declined” CVC – 123
- Expiry Date – Any date in the future
- Card Name – Any Name
- Insert budget period if applicable.
- Click on Pay Now.
- Observe the results.
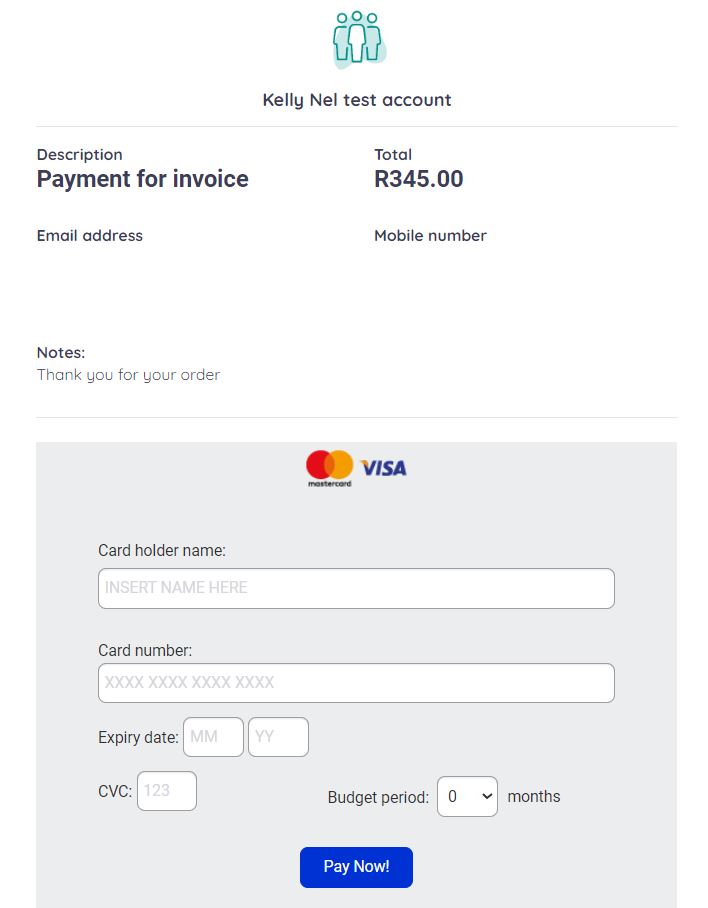
Note: The supplied credit card details will simulate the payment to a point, for a more detailed view of the process, a live transaction is an alternative as this will evoke the 3D secure process and return to the postback URLs attached to your service key.
Payment methods that can be tested when the gateway is in Test mode are:
Credit cards (existing info on QSG is fine)
Payflex
Ozow Instant EFT
Visa Click to Pay
1Voucher
paymyway
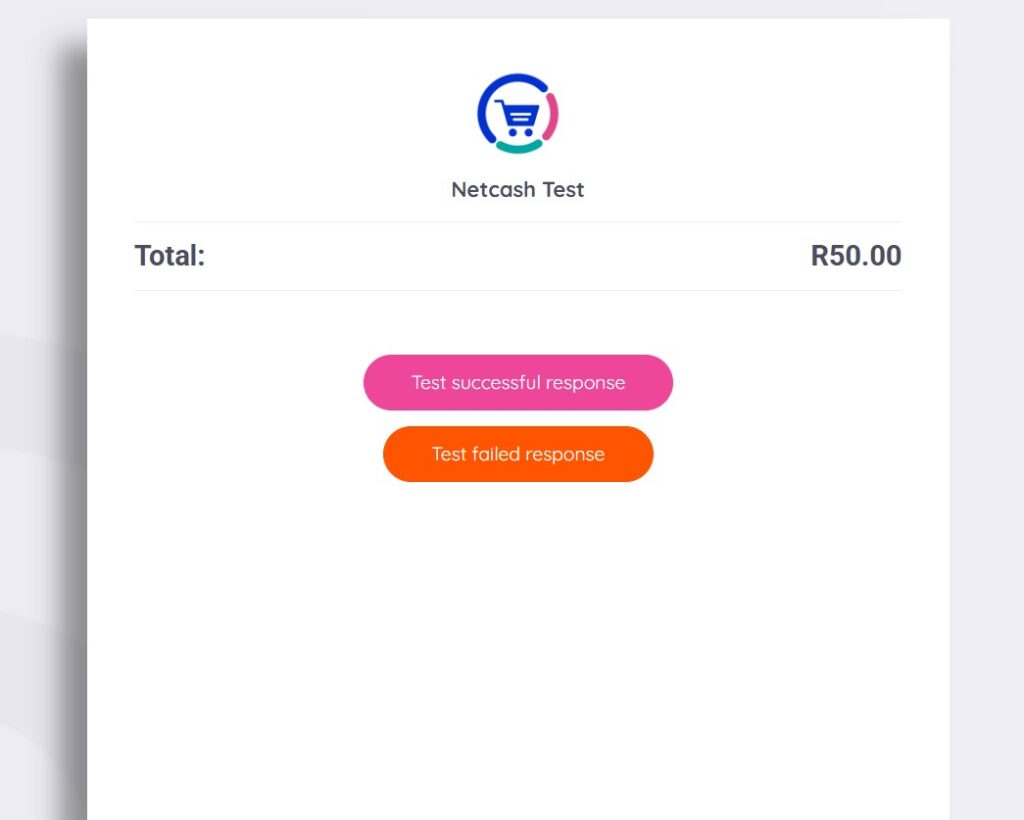
You can select the payment option and choose to see an example of a Successful or Failed transaction response. Note that during a live transaction, vouchers will typically only have a Successful outcome (payment processed) or notify the payer that the voucher input is invalid with a custom message. The Failed response is an example of this.
The following payment methods can only be tested as live transactions:
Card subscriptions
Scan to Pay/QR wallets
Bank EFT
SCode Retail Payments
If payment notifications are turned on, you will receive payment confirmation emails for each Successful response you test. You can also see the test transactions in your Netcash account, under Pay Now > Reports > Processed Transactions. These will display as an “Auth” or “Declined” transaction, depending on which response you tested.

Viewing your transaction history
- Select Services.
- Click on Pay Now from the dropdown menu.
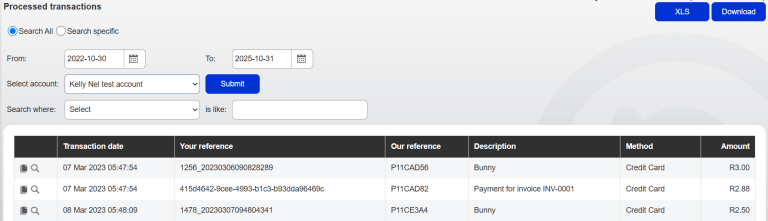
- Click on Reports > Processed transactions.
- Select the required date range and click on Select.
- The required transaction list will be supplied.
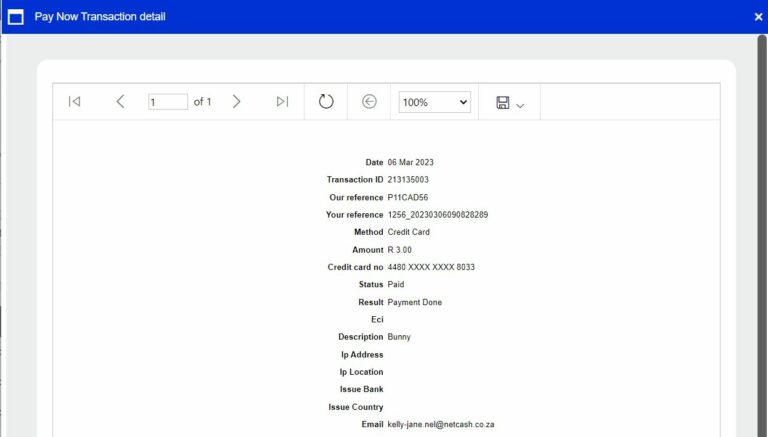
- Click on the magnifying glass next to each transaction to view the details of the transactions tracking. The transaction tracking lists the activities and the dates of that particular transaction.
- Export data by clicking on the XLS or Download buttons.
- Click on the detail transaction icon to the left of the transaction for additional detail.
- Click on the Export icon and select the preferred format to download your report.
Note: Refunds are displayed in red on the Processed Transactions report for Payflex and Ozow refunds.
Transaction tracking and unprocessed transactions
Transaction tracking
- Select Services.
- Click on Pay Now from the dropdown menu.
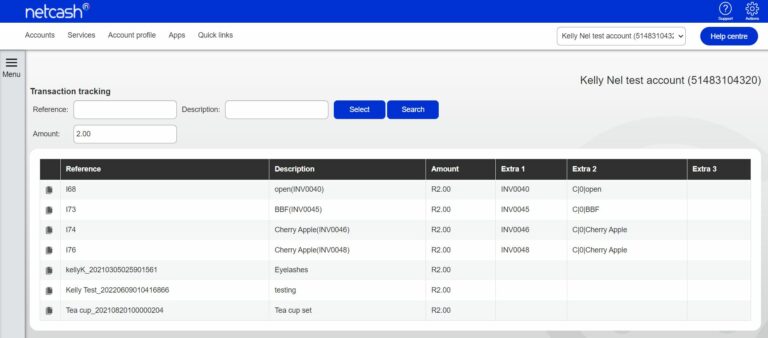
- Click on Reports > Transaction tracking.
- Insert your reference/description and amount.
- Click on Select.
- The system will search and display the required transaction.
- By clicking on the icon on the left of the transaction, additional information is displayed.
Unprocessed transactions
- Select Services.
- Click on Pay Now from the dropdown menu.
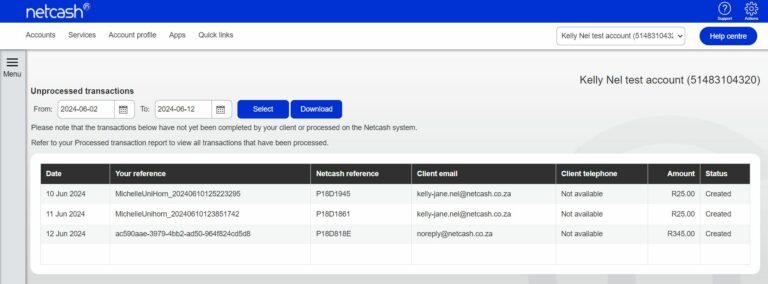
- Click on Reports > Unprocessed transactions
- Select the required date range/status and click Select.
- Click on Select.
- View the report of transactions requested.
Payment request
Create
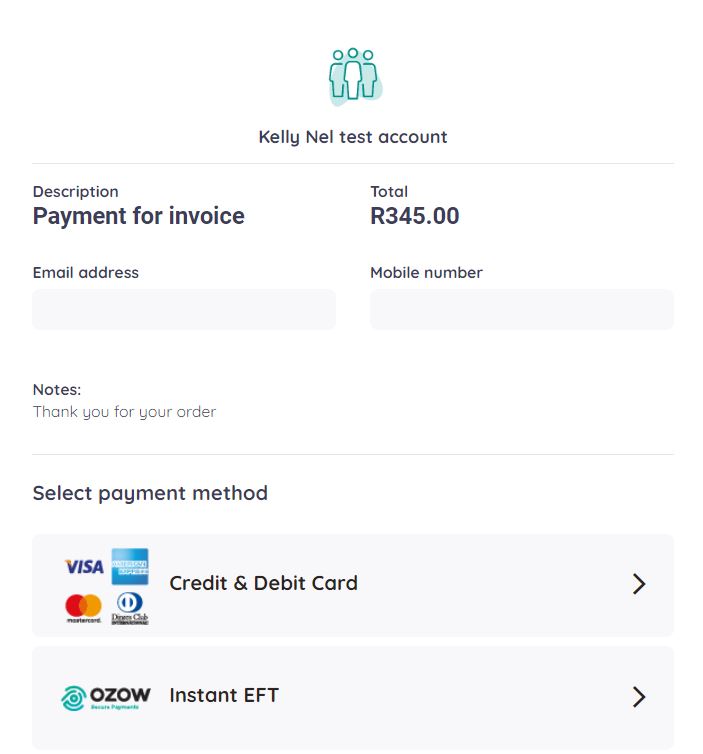
The Payment request is part of the Pay Now functionality. It is an option whereby you can use this platform to request payment from your customer. This can be used for invoicing purposes or for debit orders that have returned unpaid, and you want to provide your customers with another payment method.
With the payment request, an email or SMS will be sent to your customer containing a link to the Netcash payment portal where they can choose from several payment options, these include:
Credit card payments
Instant EFT
Bank EFT
Cash Payments
Visa Checkout
Scan to Pay
Payflex
1 Voucher
paymyway
Generate a QR code on your mobile device using the Netcash Mobile App for your customers to scan and pay with multiple wallets and banking apps.
If you already have a Payment request active and would like to send a request, please follow the steps below:
- Click on Services
- Select Pay Now from the dropdown menu
- Click on Payment Request
- Select Create
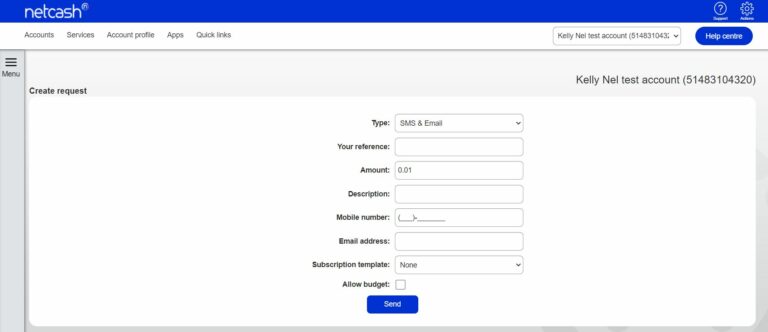
You will now be on the Create request page and will need to insert the following details:
- Type: Select the type for sending the payment request.
- Send SMS.
- Send Email.
- Send SMS and Email.
- Send a WhatsApp link.
- Generate a QR code.
Note: A preview of the type of Payment request selected will be displayed for ease of reference.
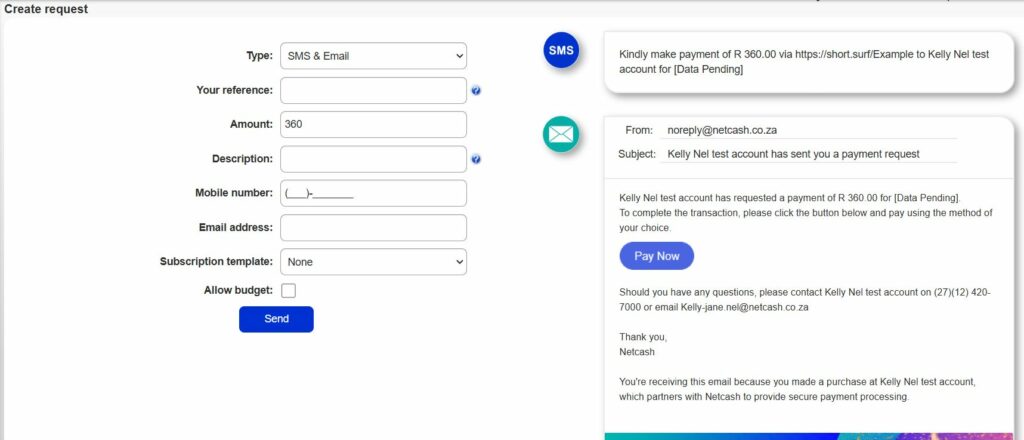
- Your reference: This would be the same reference used in the debit order Masterfile or for your internal identifying purposes.
- Amount: The amount you are requesting your customer to pay.
- Description: This will be on the link of the SMS or email you send to your customer, perhaps your company name or a description of what they want to purchase.
- Add the contact information for the type selected.
- Subscription template: Select a template if a subscription is to be added to the Payment request.
- Allow budget: Click Allow budget to enable the budget option.
- Click on send.
The payment request has been sent, please view the details on the Pay Now reports menu > Processed transactions.
Please take note of the following:
Notes:
- Your reference must be unique for each new request.
- The description will be sent in both email and sms.
- Extra fields will appear on your downloaded statement for enhanced reconciliation.
How to upload your company logo
- Select Account profile.
- Click on Contact profiles > Logo.
- Choose your logo file.
- Select Submit.
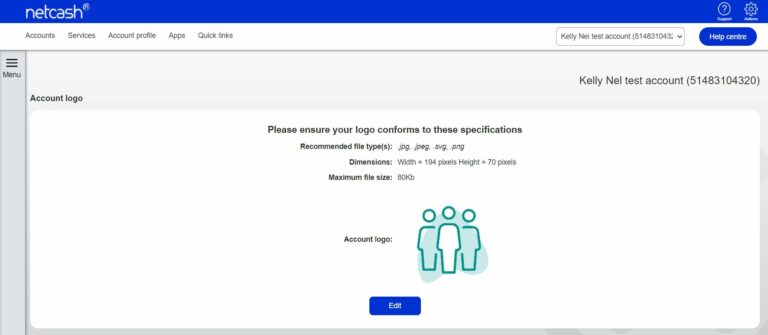
Notes:
- Files can be in .jpg, .jpeg, .bmp, or .png format
- Dimensions are 194px (w) x 70px (h)
- File size cannot exceed 80kb.
- The logo will be displayed on the Pay Now page when your customers select a payment method.
Pay Now refunds
The Pay Now refund option allows you to request a refund for various Pay Now payment methods, which will return the funds to your customers card account. Examples, where refunds can be initiated, are double payments received, perhaps your customer cancelled their order or contract. Credit card refunds can be requested within 6 months of the transaction date. If the credit card has expired, an EFT payment is an alternative.
Navigate to Pay Now – Manage – Pay Now refunds
The following payment methods can be refunded
- Credit cards
- Ozow
- Payflex
- Subscriptions
Partial refunds are only available for credit card refunds.
- Search for: select the payment method to refund.
- Enter a date range for your search.
- Amount: this can be left blank or alternatively add the transaction amount.
- Click on submit.
- A list of transactions will be displayed.
- Click on the request button for the transaction you would like to refund.
- The status will update to requested and once processed the status will display as complete.
Refund history:
Navigate to Pay Now – Manage – Pay Now refunds
Select the date range to search for the transaction. All refunded transactions will display the complete status.
Note: If there are insufficient funds in the Netcash account the refund will be rejected and you may request it again when funds are available.
A refund may take up to 7 days to be refunded to the card holders account.
