Desktop converter guide
Once you have downloaded the application, find the installation file and double click. If you get a Windows security warning, click Run.
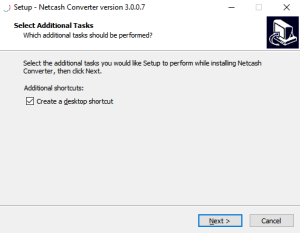
This setup screen will appear, Click Next.
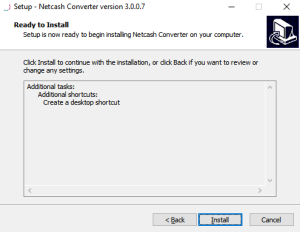
It is strongly advisable that you do NOT change any of the variables but just click on Install.
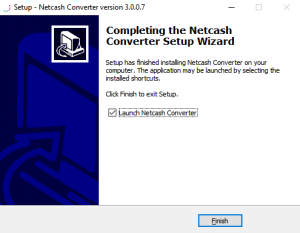
Click Finish.
If you receive a Windows Security warning, click Yes.
The application will now be installed on your PC and if you selected Open, the application will start.
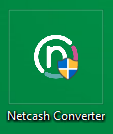
If the application did not start by default, you should have a Netcash Converter icon on your Desktop. Double click this icon to start the application.
Some users are prompted by Windows to allow the usage of the application, should you receive such warning, click Yes. It may take a few seconds for the next screen to appear.
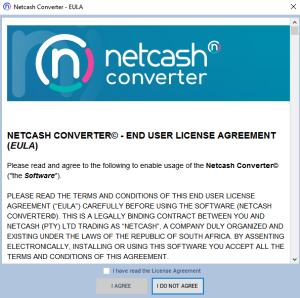
When you start up the application you will be prompted to accept the EULA. Please read this information carefully, scroll to the bottom and click I Agree to use the application. Failure to agree (clicking I DO NOT AGREE) will not allow you access to use the application.
After acceptance of the EULA you will be prompted for Netcash account credentials. These are the Service Keys and Netcash account number you will need to enable the Netcash Converter to upload data to your Netcash account .
If you do not have these credentials please contact your relationship consultant.
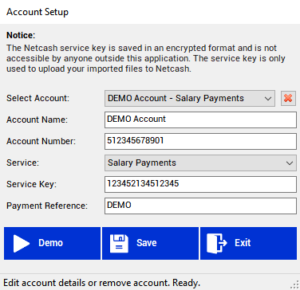
Either enter your credentials as supplied by Netcash or click Demo to create a demo account. Note: A demo account will not allow you to upload files to your Netcash account.
Once done click Save and Exit.
All the application settings are done via the account settings button – also referred to a the “Gears menu”.
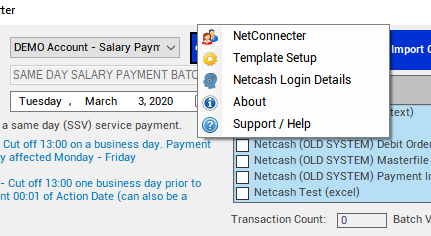
- NetConnector – where you enable Netcash services
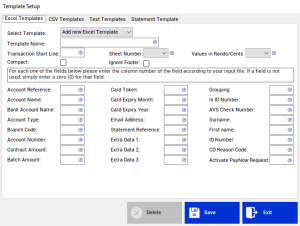
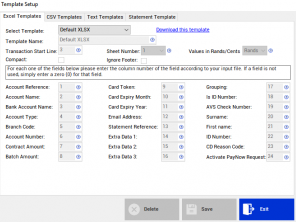
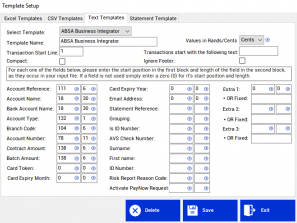
- Template Setup – where you create your own upload file formats
- Netcash Login Details – allowing Netcash website access
- About – about the Netcash Converter
- Support / Help – link to this Quick Start Guide
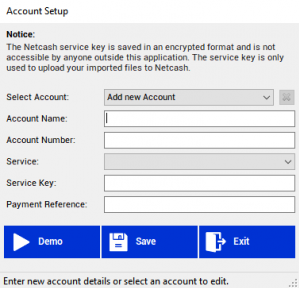
Select NetConnector from the gears menu and enter the
- Netcash Account name
- Netcash Account account number
- Select the Netcash Service you want to use
- Paste the service key for the specific service which you have copied from your online Netcash account
- (where required) enter a default reference which will be used if your template does NOT include a reference
and click Save.
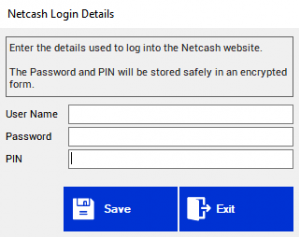 Select Netcash Login Details from the gears menu and enter your Netcash website account
- User name
- Password
- Pin code
and click Save.
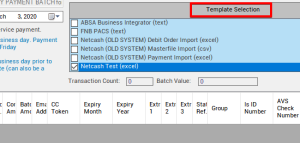
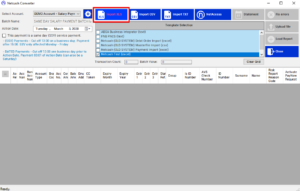
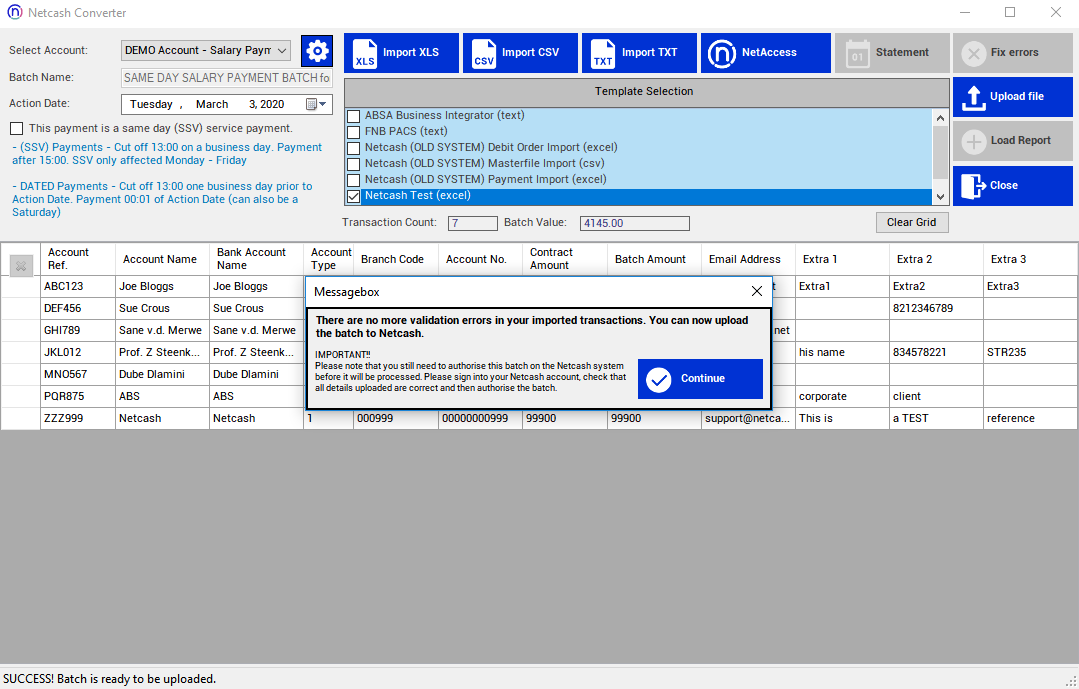
Select the account you wish to use and select the action date below.
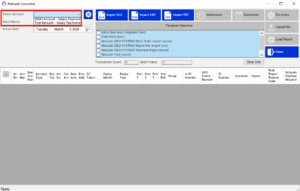
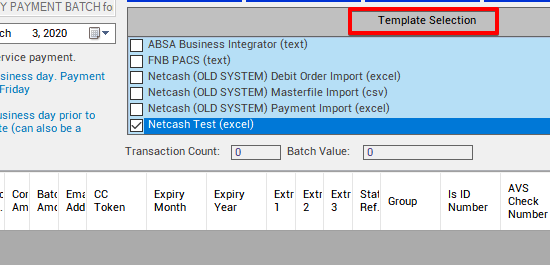
Now select the template you wish to use with the specific account (you may also create your own templates – see below)
Click the file format button on top (depending on the file format) and select the file you want to import into the application. Then click Open.
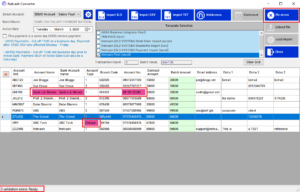
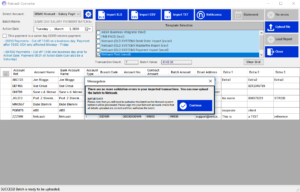
 You will note that the grid will start filling up with your line items. Should errors in the file be found, they will be indicated in pink.
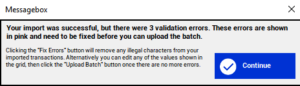
TIP: You will not be able to upload the file until all errors are corrected / fixed.
If you hover your mouse over the error field it will display the error suspected by the application.
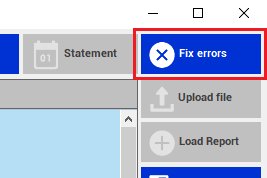
If your file contains errors you will be prompted to first fix the errors before continuing, there are two (2) options in this regard.
If the template does not correspond to your file format – no data will be imported or visible in the grid.
Fixing errors
You can either double click the field where the error is displayed or you can click Fix Errors at to top right hand corner of the error to fix all known errors in the file.
TIP : Refer to the status bar of the application to see the status of your file.
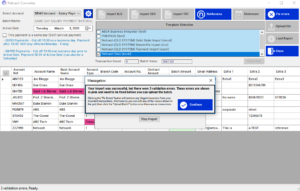
Once all errors have been fixed you will be able to upload the file to your Netcash account by clicking the Upload button on the top right, which should now be active.
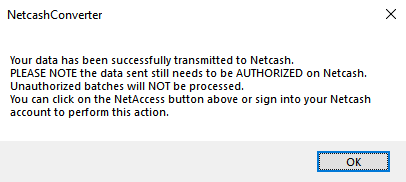
Once you see the above message you know the file has been sent to Netcash.
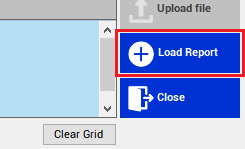
Click the the Upload Report button to get a load report of the data that was submitted. This will only be available approximately 30 seconds after the file was sent depending on the file size.

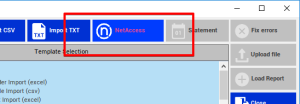
Simply click on the NetAccess button on top or sign into your online Netcash account and authorize the file.
Only AUTHORISED files on Netcash will be processed.
This application ONLY transmits the data to Netcash and DOES NOT authorise the files on their systems.
If you do not authorise the file/s on the Netcash online system the transactions WILL NOT be processed!