easiPol
DebiCheck
easiPol System Setup
Using this manual, we will start by showing you how to configure the easiPol system settings by updating the “DebiCheck Template Identifier” under the NetCash Integration Settings
Go to Tools > System Setup
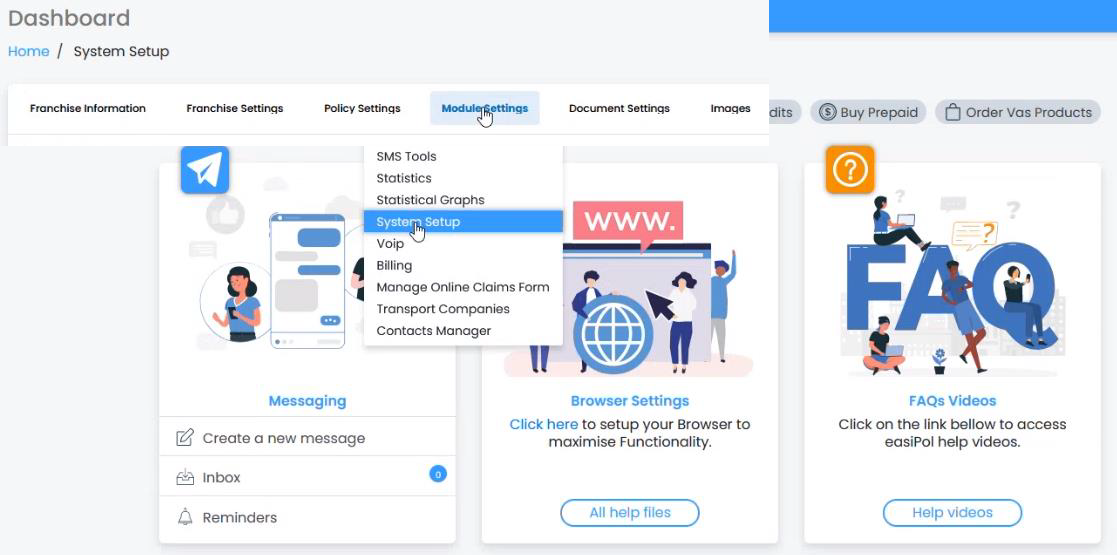
Click on Module Settings

Under the “Debit Order Setting” enter the following details
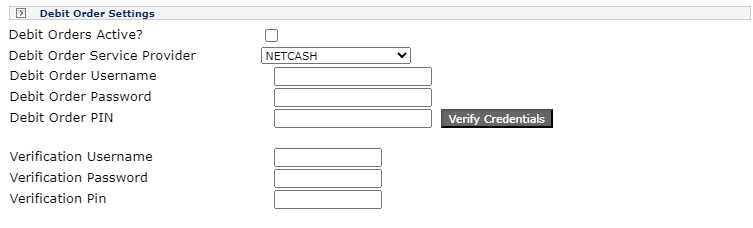
Debit Order Active – tick the box to ensure that debit orders are active
Debit Order Service Provider – click the drop-down menu to select your service provider
Debit Order Username, Password & Pin – refers to the credentials given by Netcash
Verify Credentials – click to verify if credentials are correct
Verification Username, Password & Pin – refers to the same credentials you entered before
Scroll down to the “Netcash Integration Settings” and enter the DebiCheck Template Identifier
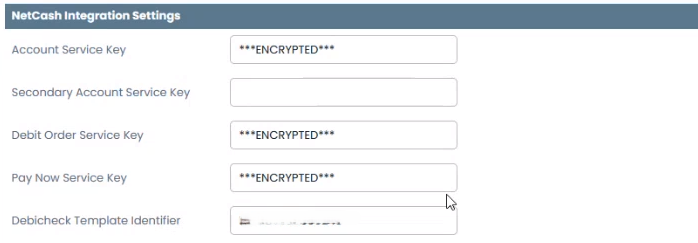
Click on Save Changes.
Activate Members for DebiCheck
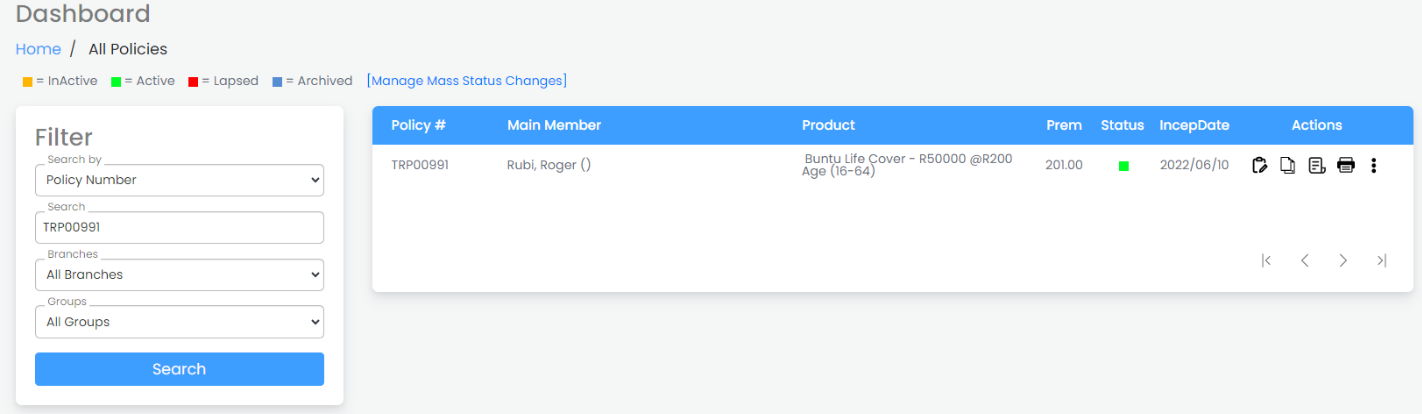
Go to Administration > Policy Admin > All Policies
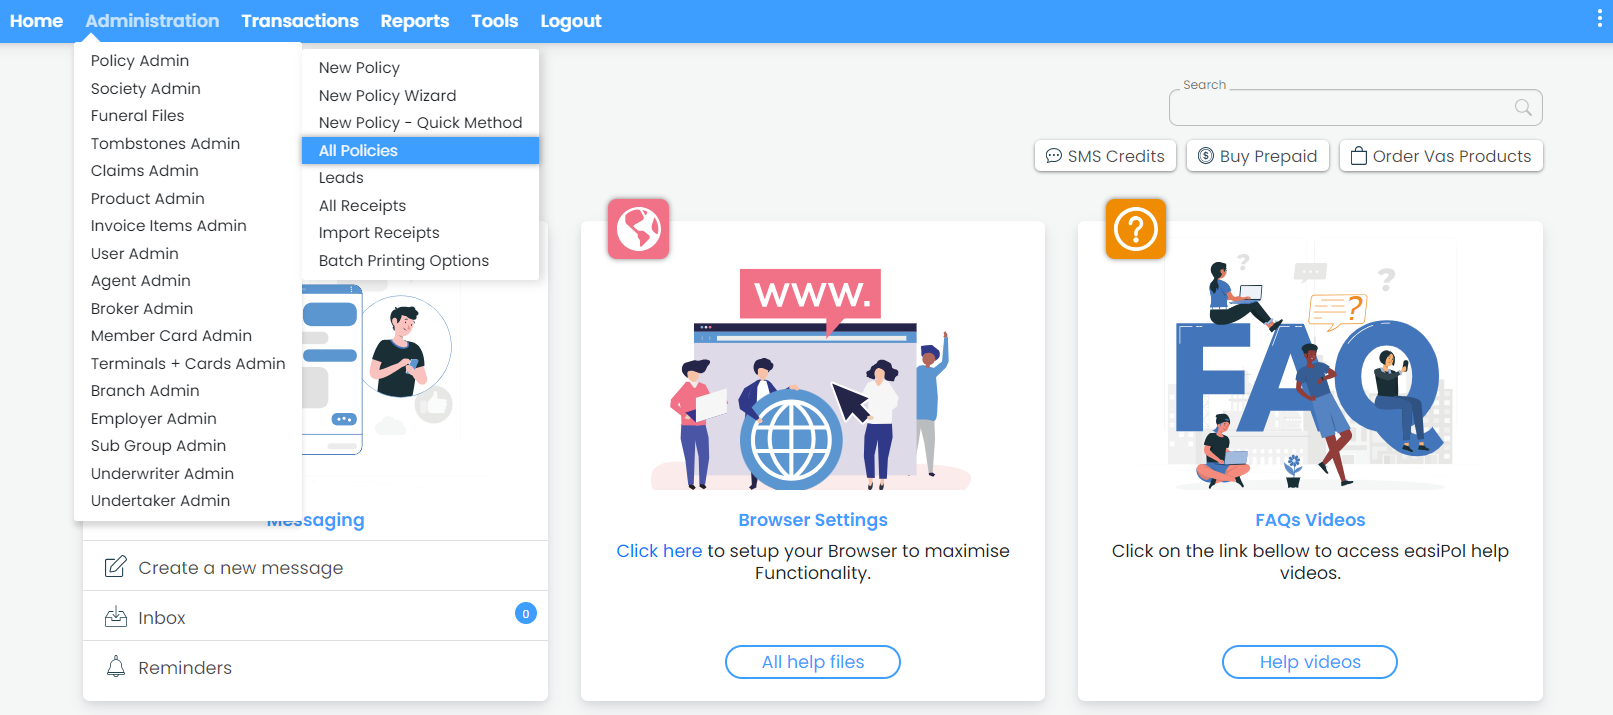
Search for the DebiCheck Policy > and click on the “Edit” button
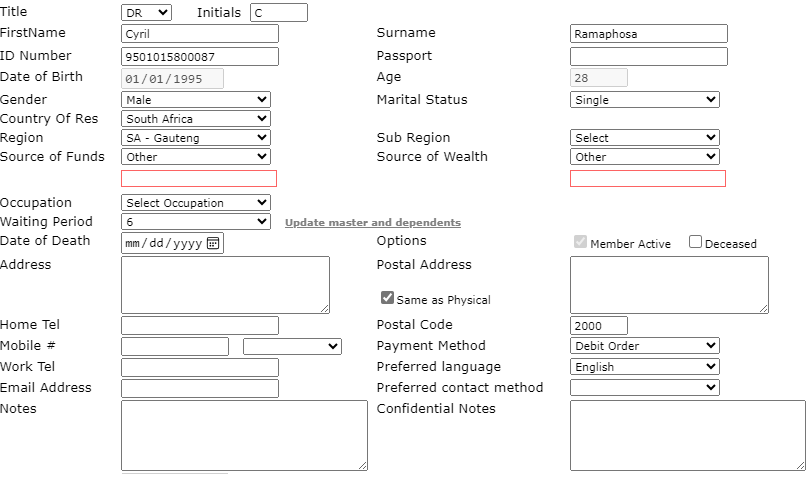
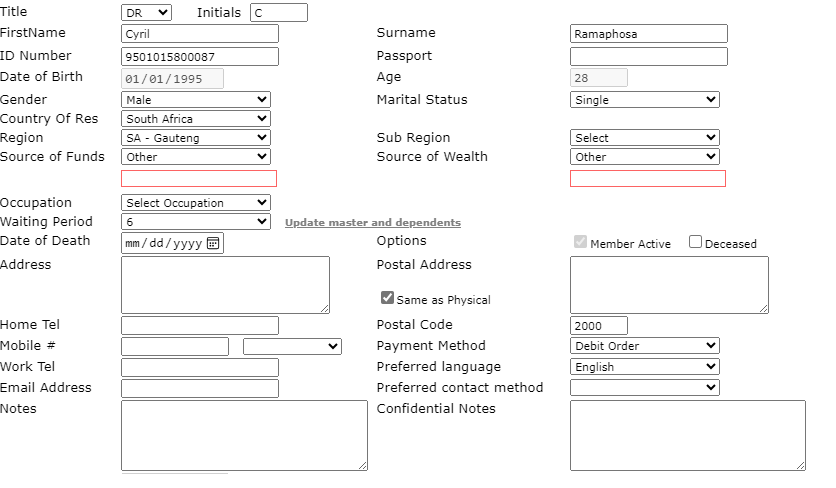
On the general details under the main member information, double check the payment method selected is showing as “Debit Order”
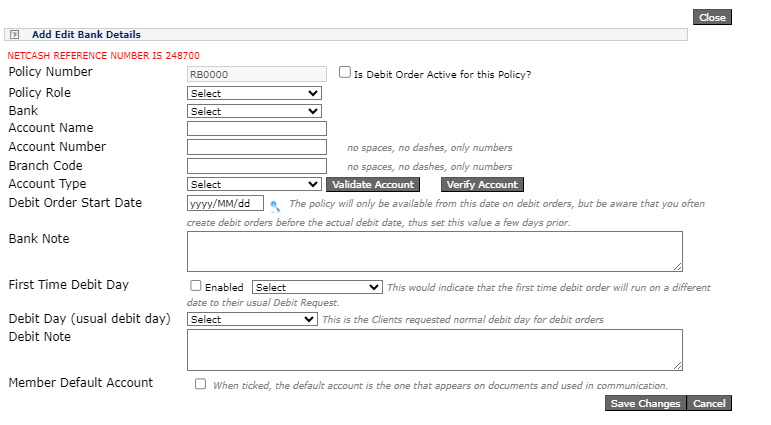
Scroll down and click on “Bank Details”.
Enter the bank details as shown below:
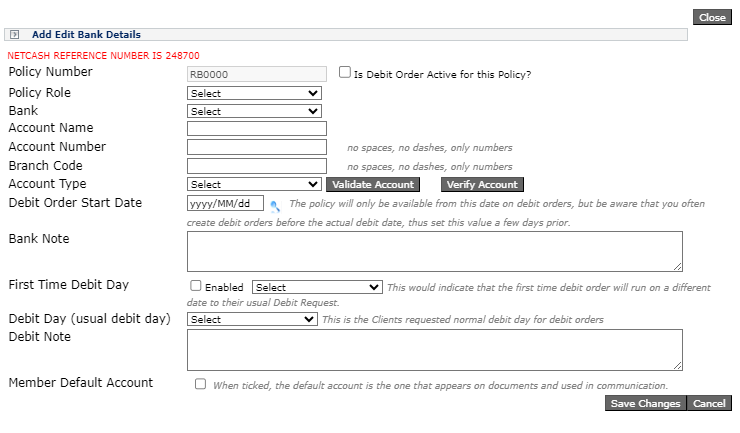
Policy role: select the main member
Bank name: name of the bank used by a customer.
Account name: name of the customers bank account
Account number: the number assigned to the customers bank account
Branch code: code assigned to each branch of a bank
Account type: type of bank account e.g. cheque, savings, or transmission account
Debit order start date: the date on which a recurring debit order is scheduled to begin
Debit/Bank note: any debit/bank note you wish to add
First time debit Day: a once off request that indicates that the first-time debit will run on a different date to their usual debit request
Debit day (usual debit day): when the premium will be withdrawn from the Policy Holders bank account
Member default account: The default account is the one that appears on documents
If the policyholder is not the person paying for the policy, click on the “Policy Payer” button to use someone else’s bank details
Enter the Policy Payer’s details: Only if the Policy Holder is not the one paying
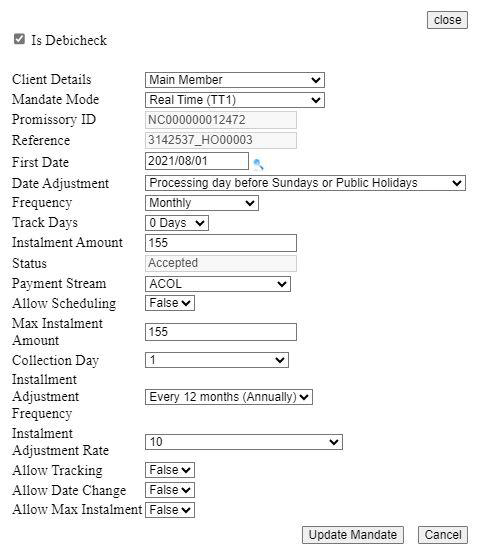
Next, click onthe “DebiCheck Mandate” button
The DebiCheck Mandate screen is mainly used to show the status of the Mandate as shown below:
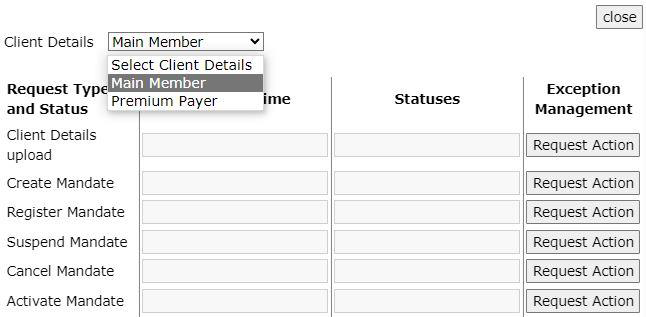
Next click on the “DebiCheck Requests” button
This screen allows you to view request types and statuses (either for the main member or the premium payer)
Creating Batches
Manual batches
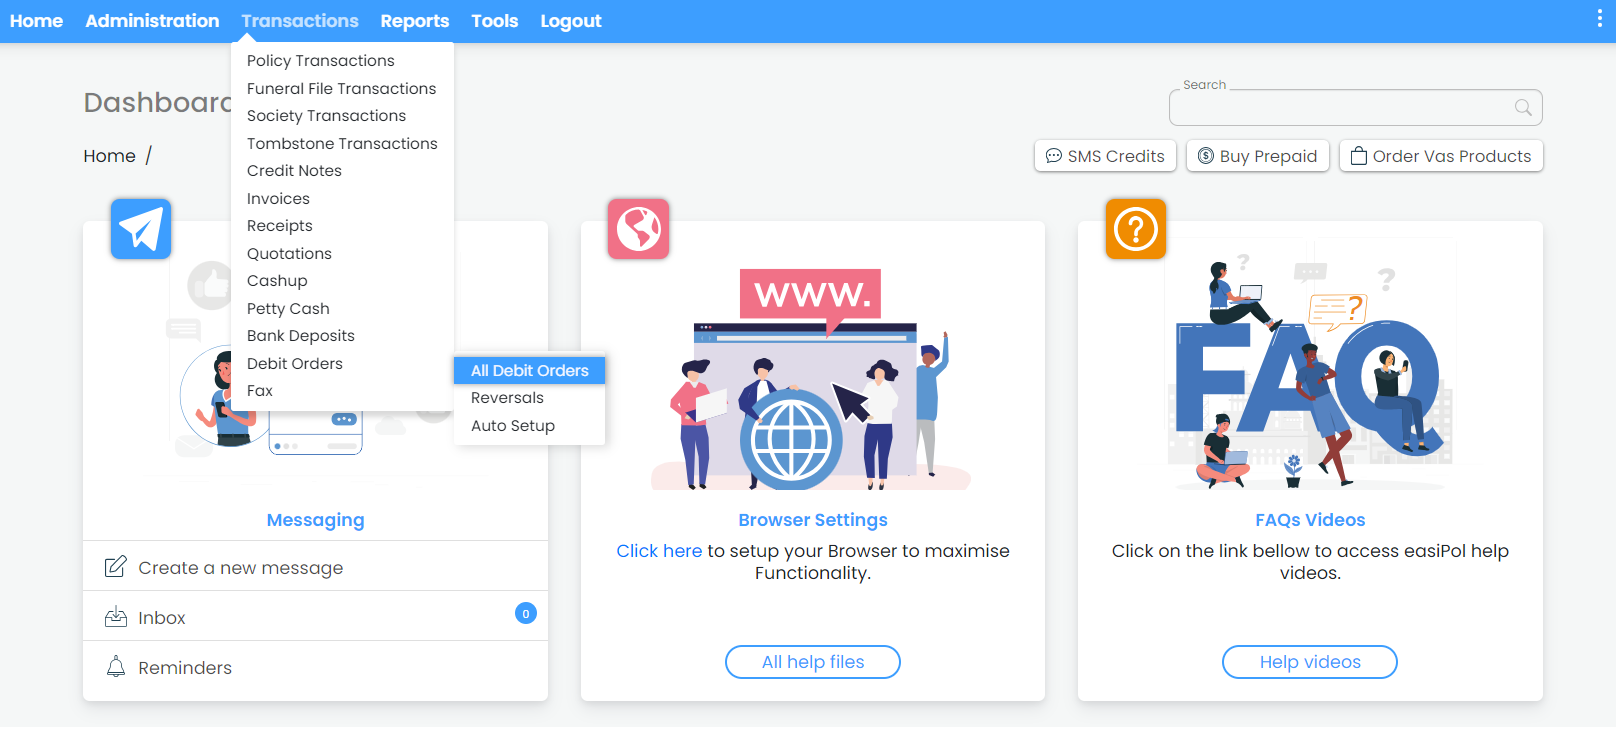
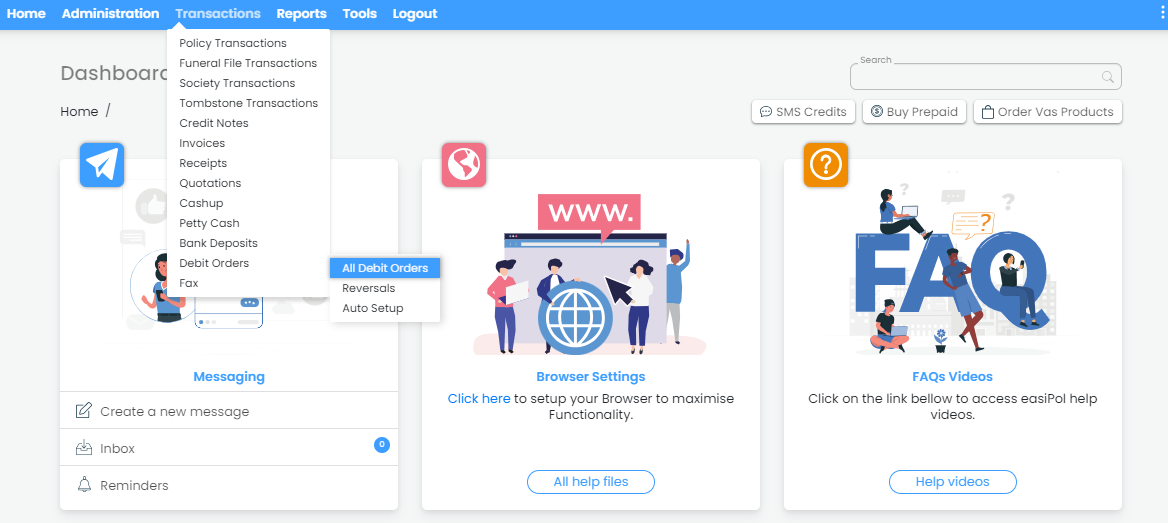
To create a batch manually go to Transactions → Debit Orders → click on “All Debit Orders”
Click on the “Create New” button
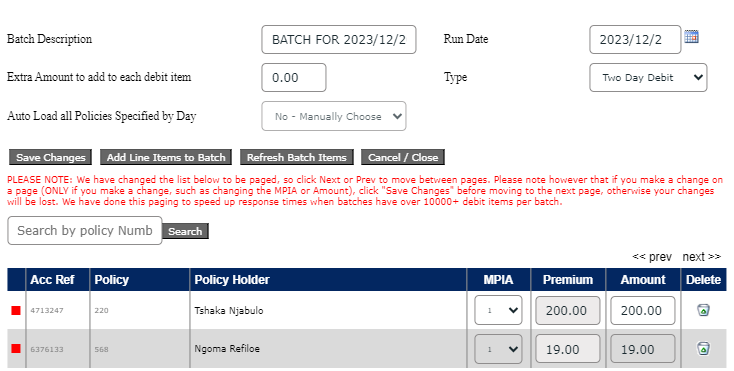
A page will pop up where you can enter your batch details

Batch Description – enter the batch description, e.g. Batch for dd/MM/yyyy
Run Date – select the date for when the batches will run
Extra Amount to add to each debit – if there is an extra amount that needs to be added to each debit item, you can add the amount (not mandatory)
Type – refers to a same day debit or two-day debit
Auto load policies specified by day – select the day you want the batch for, for example, if you select 15, the system will automatically load all policies with that debit date for customers who want their debit to run on the 15th of every month
Once you have entered the batch details, click on “Save Changes”, and then you will see a list of policies as shown below:
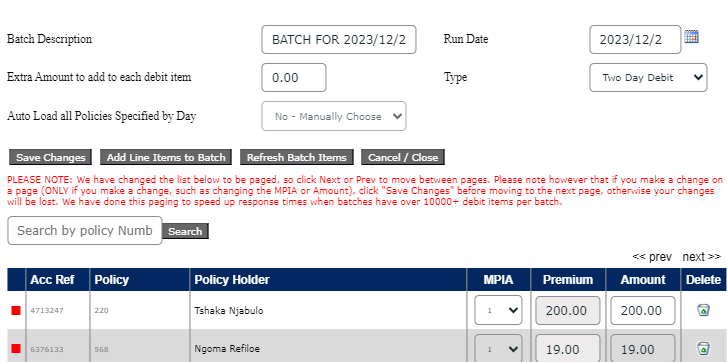
Acc Ref – it is the date of debit chosen by the customer.
Policy – refers to the policy number, which will be debited
Policy Holder – refers to the policyholder’s full name
MPIA or “Months Paying In Advance” – displays the number of months being debited
Premium – refers to the policy premium
Amount – refers to the amount which will be debited
Delete – allows you to delete a policy from the debit batch
Once you have successfully created a batch, click on the “Cancel/Close” button
Batches Submission/Authorisation
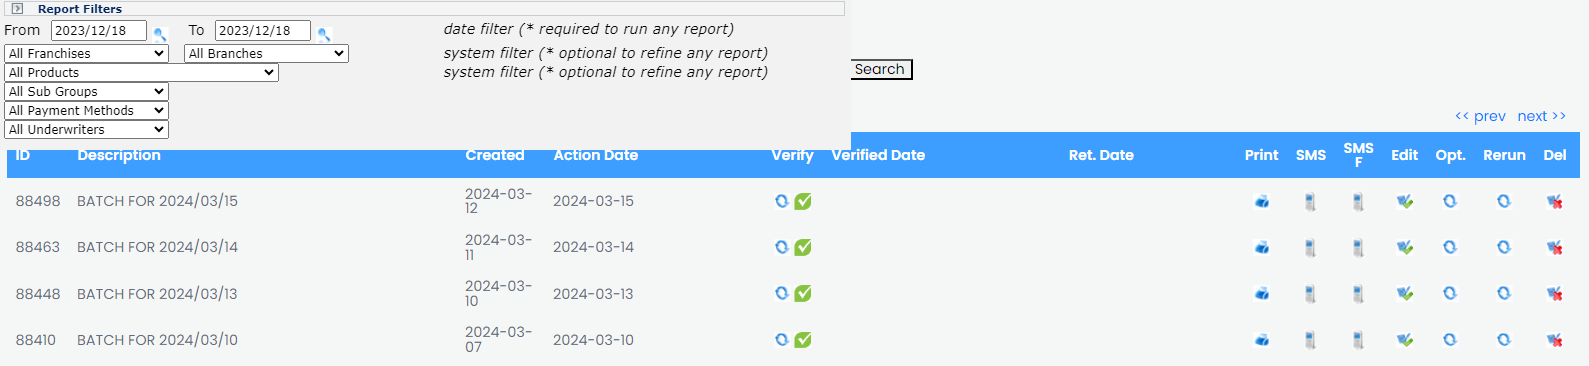
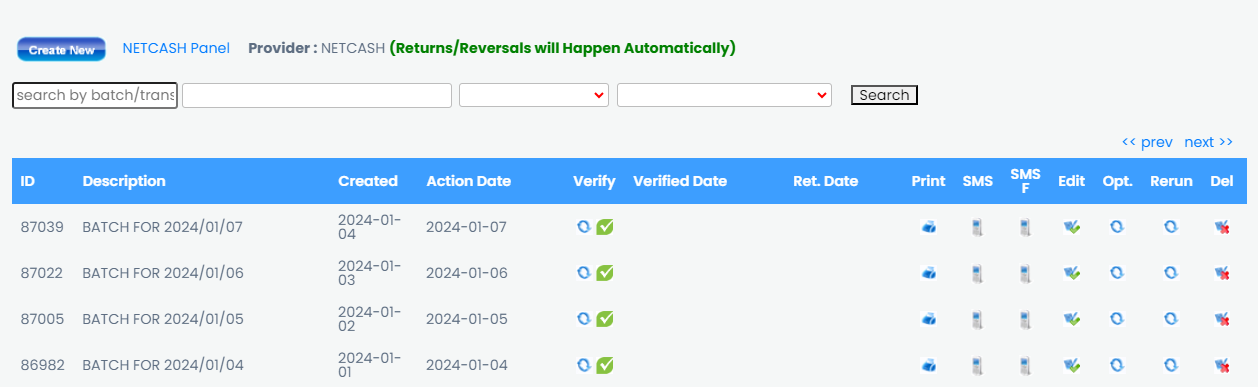
On the creation of batches on easiPol, the user will be able to “Verify” batches. When verifying DebiCheck batches, ensure you click on the green icon. Refer to the screenshot below:
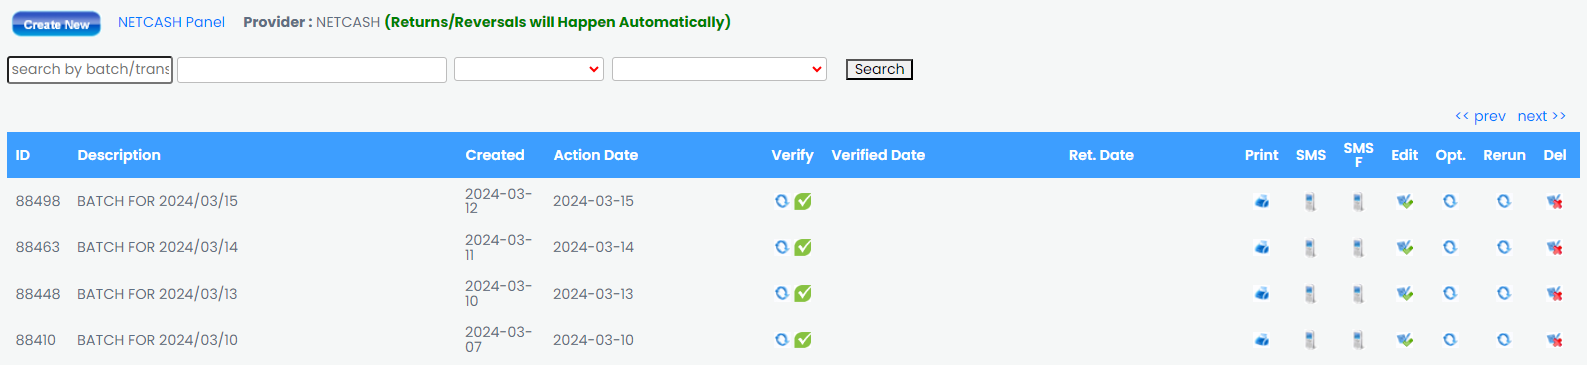
ID – refers to the batch ID
Description – refers to the description of the batch
Created – refers to when the batch was created
Action date – refers to when the batch will be actioned (run date)
Verify – click on the green Verify icon to verify the DebiCheck batch
Verified date – the date when the batch was verified
Return Date – the date when the debit order results have been returned (wait at least 5 days after the Action Date)
Print – allows you to see a breakdown of every transaction made on that batch, for example, the date the batch was created, verified and returned and by which user on the system.
SMS/SMS F – allows you to manually send SMS’s to customer whose debit orders were either successful or unsuccessful
Edit – allows you to edit the batch (once a batch is verified, it CANNOT be edited)
Options – icon allows you to add joining fees to the debit orders
Rerun – allows you to re-run debit orders for all debit order failed policies
Delete – allows you to delete a batch (Verified or Returned batches cannot be deleted)
Please note that when a batch is created, the system will automatically look at all those policies and see if there is a DebiCheck mandate in place. If there is no mandate, the system will automatically send a DebiCheck request. And if there is already a mandate in place and it’s once a batch has been verified on easiPol, the same batch will have to be authorised on Netcash.
Go to Menu > click on Manage Debit Orders > DebiCheck Batches
Navigate to Services/Debit Orders/Manage debit orders/DebiCheck batches
Note the cut-off times for DebiCheck batch authorisation: Monday to Friday, one clear business day prior to the action date by 23h59. Example – authorise by 23h50 on Tuesday for Thursday’s action date (Wednesday is the clear business day).
All DebiCheck and RMS authenticated contracts appear for selection. Note that each authenticated mandate for a specific customer will appear for selection, meaning that Duplicate Account References are allowed.
Edit Tracking days and amounts if required.
Authorise the batch
Debit Order Reports
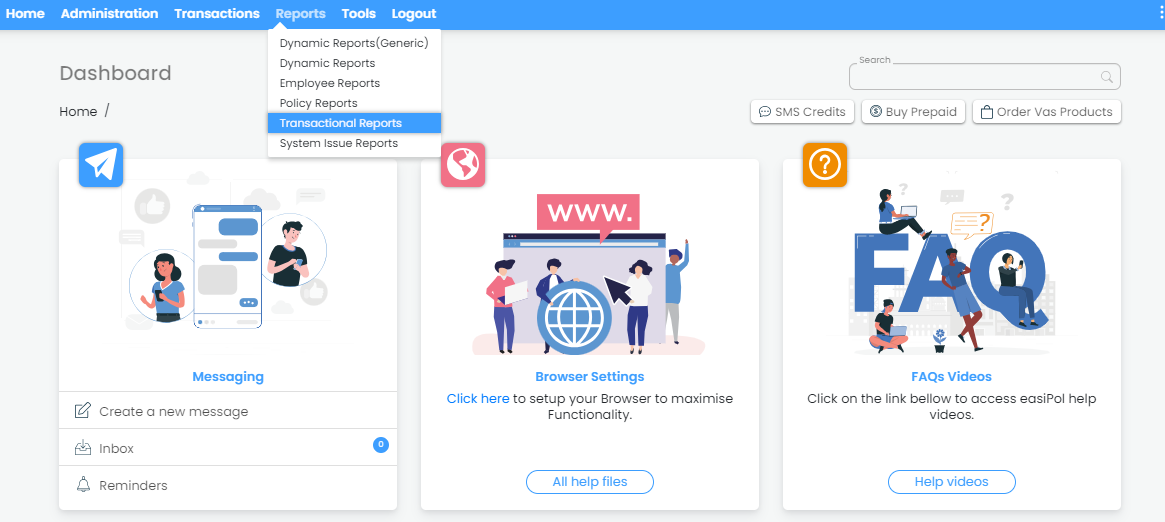
easiPol > Go to Reports > Transactional Reports
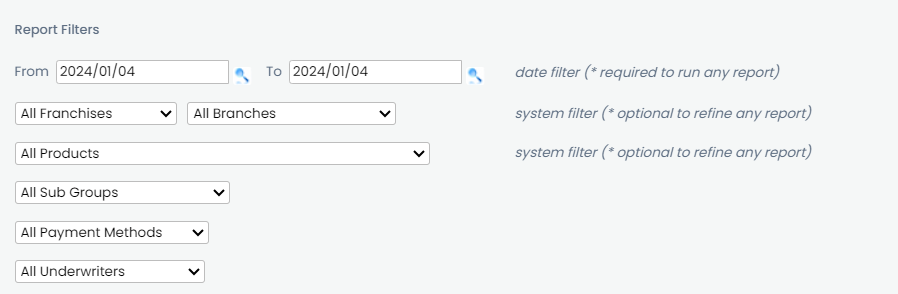
Using the Report Filters, apply the necessary filter before you extract a report
Scroll down to the “Debit Order Reports” → click on any of the below shown reports
Once you have clicked on any of the 5 reports, a pop up log will show up, and you can click on the following options “View/Print” or “Download or Email Report”
Debit Orders
The Purpose of the Manual is to ensure effective understanding of the EasiPol System. The manual covers the following areas: Debit Order Management Process
Debit Order Management Process
easiPol > Go to Tools > System Setup
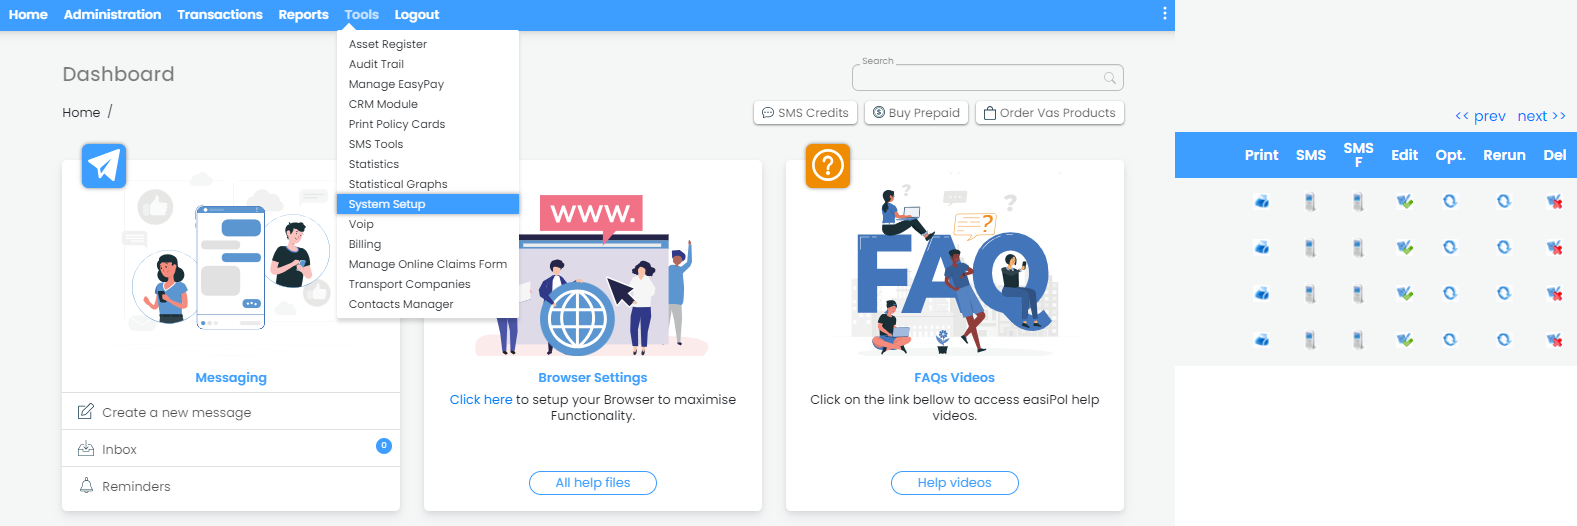
Click on Module Settings
Under the “Debit Order Setting” enter the following details:
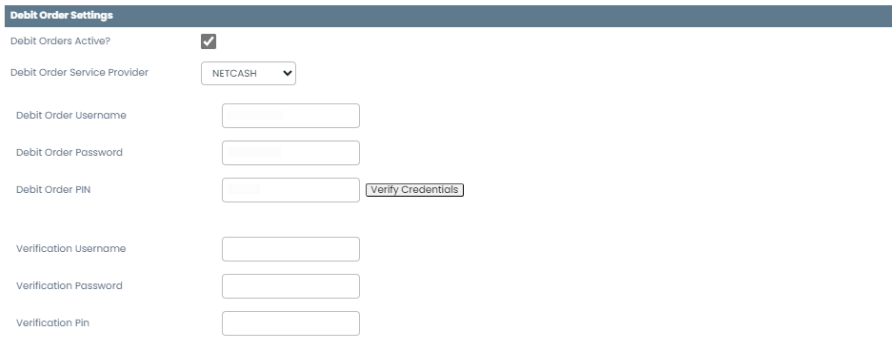
Debit Order Active – tick the box to ensure that debit orders are active
Debit Order Service Provider – click the drop-down menu to select your service provider
Debit Order Username, Password & Pin – refers to the credentials given by Netcash
Verify Credentials – click to verify if credentials are correct
Verification Username, Password & Pin – refers to the same credentials you entered before
When all is verified, you can now save changes, and your debit order function is now active on your system
Activate Members for Debit Orders
To activate members for debit orders you need to make sure that you follow the step correctly when opening a new policy
On general details under the main member information, make sure the payment method you have selected is “Debit Order”
Go to the “Bank Details” and enter the bank details as shown below
Policy role: select the main member
Bank name: name of the bank used by the customer.
Account name: name of the customers bank account
Account number: the number assigned to the customers bank account
Branch code: code assigned to each branch of a bank
Account type: type of bank account, e.g. cheque, savings, or transmission account
Debit order start date: the date on which a recurring debit order is scheduled to begin
Debit/Bank note: any debit/bank note you wish to add
First time debit Day: a once off request that indicates that the first-time debit will run on a different date to their usual debit request
Debit day (usual debit day): when the premium will be withdrawn from the Policy Holder’s bank account
Member default account: The default account is the one that appears on documents.
Creating Batches & Running Debit Order Transactions
Manual batches
To create a batch manually, go to Transactions > Debit Orders > click on “All Debit Orders”
Click on the “Create New” button
A page will pop up where you can enter your batch details

Batch Description – enter the batch description, e.g. Batch for dd/MM/yyyy
Run Date – select the date for when the batches will run
Extra Amount to add to each debit – if there is an extra amount that needs to be added to each debit item, you can add the amount (not mandatory)
Type – refers to a same day debit or two-day debit
Auto load policies specified by day – select the day you want the batch for, for example, if you select 15, the system will automatically load all policies with that debit date for customers who want their debit to run on the 15th of every month
Once you have entered the batch details, click on “Save Changes”, and then you will see a list of policies as shown below
- Acc Ref – it is the date of debit chosen by customers
- Policy – refers to the policy number, which will be debited
- Policy Holder – refers to the policyholder’s full name
- MPIA or “Months Paying in Advance” – displays the number of months being debited
- Premium – refers to the policy premium
- Amount – refers to the amount which will be debited
- Delete – allows you to delete a policy from the debit batch
Verifying and Returning Batches
Once a batch/batches have been created you will need to verify those batches. Refer to the screenshot below
- ID – refers to the batch ID
- Description – refers to the description of the batch
- Created – refers to when the batch was created
- Action date – refers to when the batch will be action (run date)
- Verify – clicking on the Verify Icon will allow you to send to the Debit Order provider
- Verified date – the date when the batch was verified
- Return Date – the date when the debit order results have been returned (wait at least 5 days after the Action Date)
- Print – allows you to see a breakdown of every transaction made on that batch, for example, the date the batch was created, verified and returned and by which user on the system.
- SMS/SMS F – allows you to manually send SMS’s to customers whose debit orders were either successful or unsuccessful
- Edit – allows you to edit the batch (once a batch is verified it CANNOT be edited)
- Options – icon allows you to add joining fees to debit orders
- Rerun – allows you to re-run debit orders for all debit order failed policies
- Delete – allows you to delete a batch (Verified or Returned batches cannot be deleted)
Debit Order Reports
To access the debit order reports, use the following steps shown below
Go to Reports > Transactional Reports
Using the Report Filters, apply the necessary filter before you extract a report
Scroll down to the “Debit Order Reports” > click on any of the below shown reports
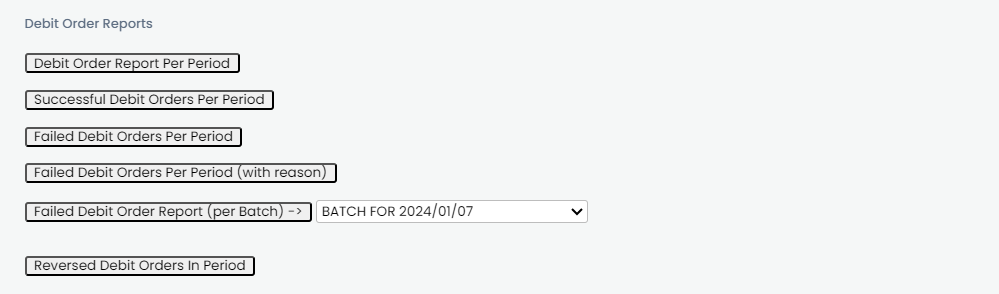
Once you have clicked on any of the 5 reports, a pop-up log will show up, and you can click on the following options “View/Print” or “Download or Email Report”
