Sage 50cloud Pastel Partner
Our easy to use guide will get you up and running in no time!
Supplier payments: Issuing and inserting service keys
Service Keys are a vital part of system security and should be treated with the utmost confidentiality. Sage Pastel requires 2 service keys:
- Account service key
- Salary payments key
- Risk reports (optional; used for verifications and credit checks)
Add an account service key
- Click on Account Profile.
- Select Netconnector > Account service.
- Tick the active box.
- Insert an email address to receive notifications.
- Tick Postback URL active box.
- The predefined URL dropdown menu must be set to Sage Pastel Partner Accounting.
- The Statement download option is set to none.
- Click on the Submit button.
- The service key is generated and emailed to the email address linked to the service key.
Add a creditor payments service key
- Click on Account Profile.
- Select Netconnector > Creditor payments.
- Tick the Active box.
- Insert an email address to receive notifications.
- The Postback URL active box ticked.
- The predefined URL dropdown menu must be set to Sage Pastel Partner Accounting.
- Choose from the following options: Ignore errors, Auto forward action date or Lock batch on upload. (See notes below for detail).
- Click on the Submit button.
- The service key is generated and emailed to the email address linked to the service key.
Note:
- Select Ignore errors if you would like Netcash to process payments to valid bank accounts and ignore invalid bank accounts. Leaving this option unticked will result in all payments rejecting if any one payment is invalid.
- Auto forward action date will move your payments to the next valid action date if you have missed your cutoff time.
- Lock batch on upload will not allow any editing of supplier details once the supplier batch is sent to Netcash.
Generate a risk reports service key
- Select Account Profile.
- Click on Netconnector > Risk reports.
- Tick the active tick box and insert an email address.
- Select the Nominated Enquirer.
- Tick postback URL active.
- Select the Sage Pastel Partner Accounting Postback URL.
- Select Submit.
- The risk reports service key is not inserted into Pastel accounting. The key must be generated in Netcash. Checks will be performed on the supplier/customer masterfile
Inserting service keys
- Login to Sage 50cloud Pastel Accouting
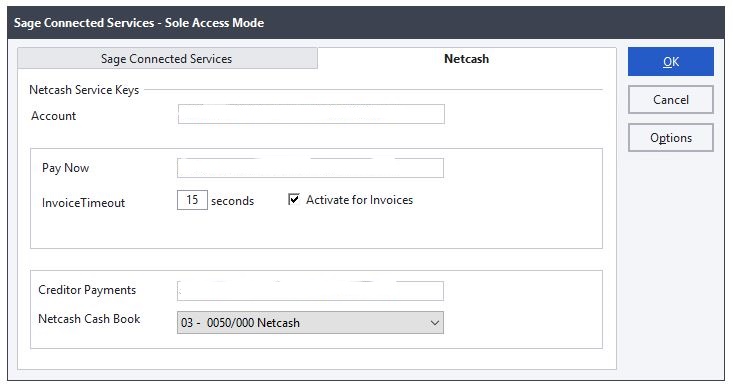
- Select Utilities > Sage Connected Services.
- Insert your two Service Keys in the fields provided.
- Select the Netcash cashbook (please ensure that a Netcash cashbook has been created for reconciliation)
- Click OK.
Submitting creditor batches to Netcash
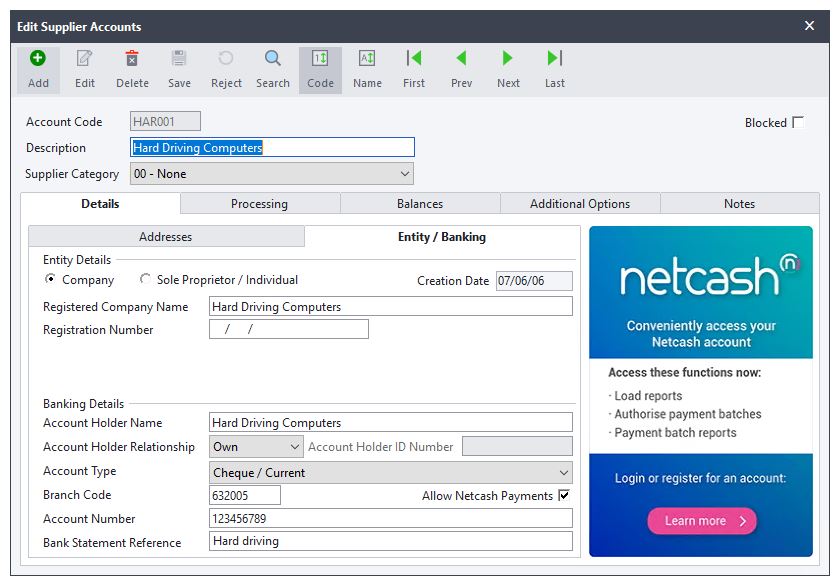
- Select Edit > Suppliers > Accounts.
- Ensure that you have valid bank account details entered for each of your supplier records.
IMPORTANT: You must indicate to each supplier whether you will be processing payments to this supplier from your Netcash account. Select the Allow Netcash Payments option where applicable. The option will not be available for Suppliers who have been set up with foreign currency codes.
Note: Verifications and Credit checks can be requested for the supplier by clicking on the Netcash banner in the Masterfile > Entity banking.
If your Netcash login credentials have been captured in your User details you will have direct access to your Netcash account when clicking on the banner to perform the required checks. Alternatively add your Netcash credentials when selecting the Netcash banner.
Reports can be viewed within your Netcash account
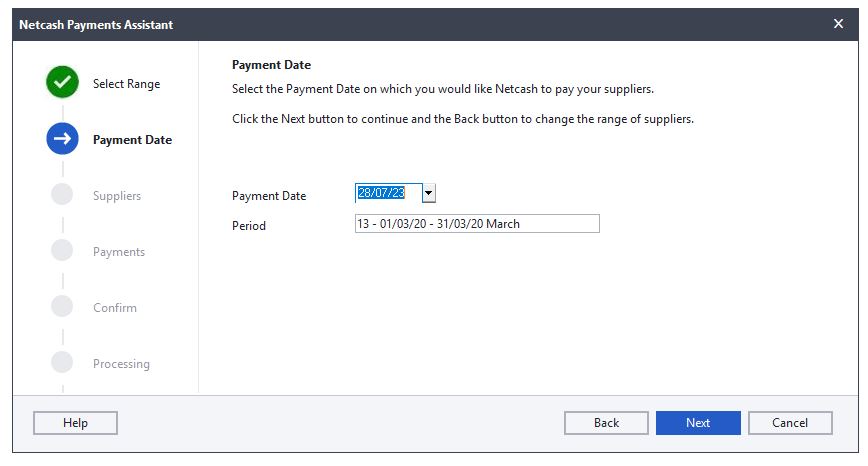
- Select Process > Cashbook > Netcash Payments Assistant.
- Select the range of suppliers you wish to include in the payments process.
- Click Next to continue.
- Enter the date that payments need to be processed.
- Click Next to continue.
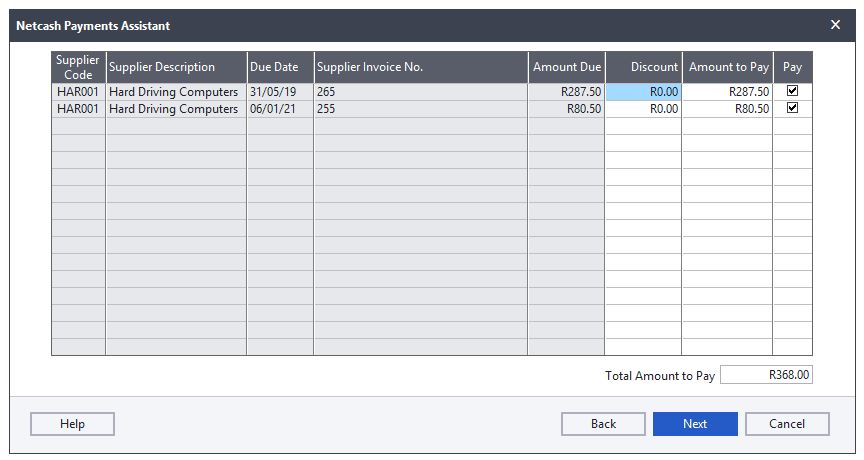
- The Netcash payments assistant will generate a list of supplier invoices due. You may select which ones you want to include on the Netcash Creditor payments batch.
IMPORTANT: Only Suppliers who were set up for Netcash Payments and who have outstanding invoices due to them will be displayed on the Netcash Payments grid.
Once you have selected the invoices you wish to include in the payment instruction, click Next to continue.
Review the payment you are about to make before you select Process to process the payment.
Your payment batch will now be submitted to Netcash.
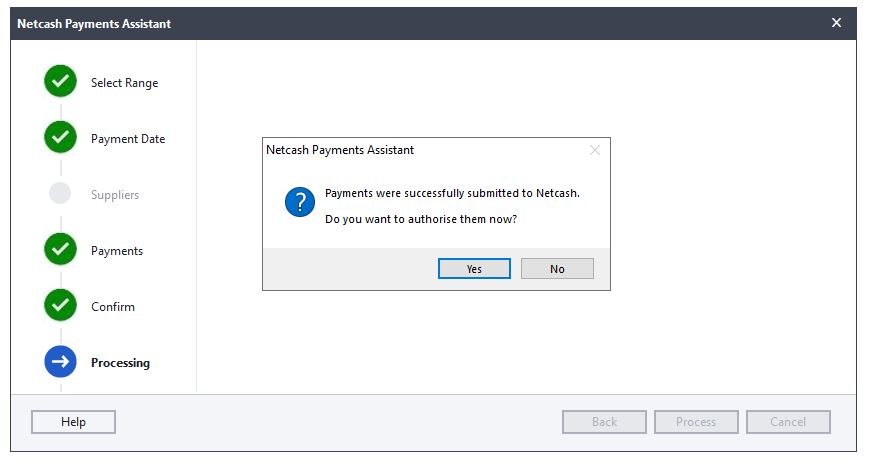
5. Please log into your Netcash account to authorise the payment batch.
Authorising creditor batches
- Select Services.
- Select Payments from the dropdown menu.
- Click on Creditors > Creditor batches.
- The list of creditor batches will be displayed.
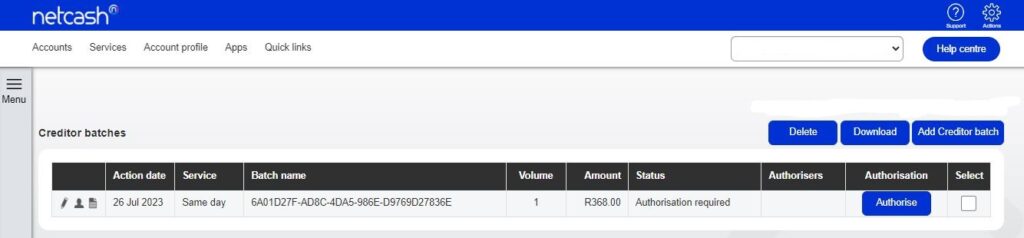
To download your Pre-Authorisation Report, select the View Clients icon on the left of the creditor batch.Click on the Download button.Your creditor batch report will be displayed on the screen. Click on the Save icon and select the preferred format to download your report.The batch will automatically start downloading and save in your default downloads folder.
Note: The Pre-Authorisation report details all creditor payment transactions uploaded to Netcash from Sage Pastel Partner Accounting. Certain transactions may have been rejected due to validation failure of banking details. These details will be emailed to you by Netcash or you can access them by selecting Account profile > Integration Tools > Batch file upload report.
6. Click on the Authorise button next to the batch that you would like to authorise.
The Confirm batch authorisation screen is displayed. This is a summary of the creditor batch including charges, notifications and a choice of funding options:
Use the available balance if there is sufficient credit in your Netcash account
Will make a bank transfer if you need to fund the Netcash clearing account for payment
Read and accept the terms and conditions, then click on Authorise.
- Should you elect to pay using the available balance you will then be re-directed to the Confirm Batch authorisations screen.
- Insert the One Time Pin (OTP) sent to your cell number or Google authenticator pin.
- Click OK.
- Your creditor batch is now authorised and will be scheduled to run on the selected date.
Note: If you require additional authorises, please inform them to authorise the batch before the cut-off.
- If you are paying using the Will Make bank transfer option, you will be prompted to insert the following information:
-
- The date when the transfer will be made
- The Netcash account you will be transferred to
- The amount to be transferred
- The extra fields are optional for reconciliation purposes
- Click on Next.
- Click on a Print Report in order to obtain details of the Netcash clearing that you need to fund.
- Click Authorise to confirm your bank transfer.
- Insert the One Time Pin (OTP) sent to your cell number or Google authorisation pin.
- Your creditor Batch is now authorised and will be scheduled to run on the selected date.
Note: One Time Pins are session based. This means that as long as you are logged in to your Netcash account, you can use the same OTP to authorise. Where multiple authorisations are required, only the first authoriser needs to insert the OTP. An alternative to OTP is 2 Factor authentication.
Viewing batch reports
- Select the Services.
- Click on Payments from the dropdown menu.
- Select Creditors > Creditor batch reports.
- Click on the printer icon to the left of the batch.
- Click on the Save icon and select the preferred format to download your report.
- The batch will automatically start downloading and save in your default downloads folder.
Pay Now
- Issuing service keys
- Inserting your service keys
- Creating and sending customer invoices
- Viewing your Pay Now report in Netcash
Add a Pay Now service key
- Select Account profile.
- Click on Netconnector > Pay Now.
- Tick the Active box.
- Insert the email address to which Netcash must send reports.
- Activate test mode if you do not want to process live transactions yet.
- Choose your payment options:Credit card and QR | Bank EFT | Cash | Instant EFT | Paylfex | 1 Voucher
- Predefined URL group set to None.
- Click on Notify my customers if you would like Netcash to confirm acceptance of their payment.
- Click on Submit.
- Our service key is generated and can now be inserted into Sage 50cloud Pastel.
Inserting your service keys and editing customer accounts
- Login into Sage 50cloud, click on Utility> Sage Connected Services > Netcash.
- Insert the Pay Now Service key.
- Click ok.
Creating and sending customer invoices.
- Navigate to Process| Customers
- The following screen displays:
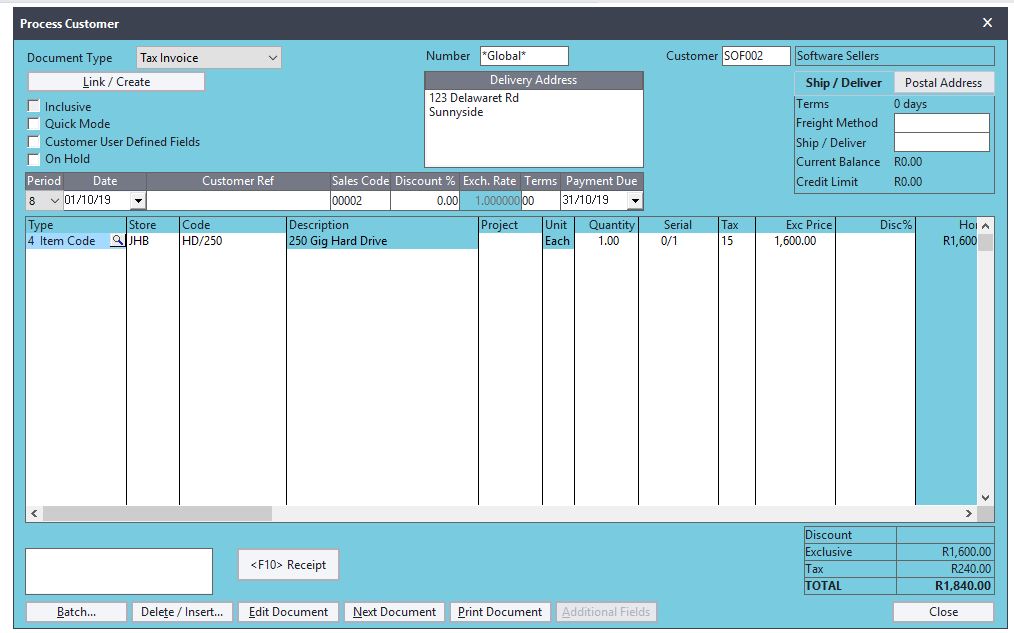
- Complete the invoice screen with the necessary information.
- Click on the Print button.
- The system will ask you if you want to print the invoice, click on the Yes button.
- The Netcash banner will be displayed in the footer on the invoice.
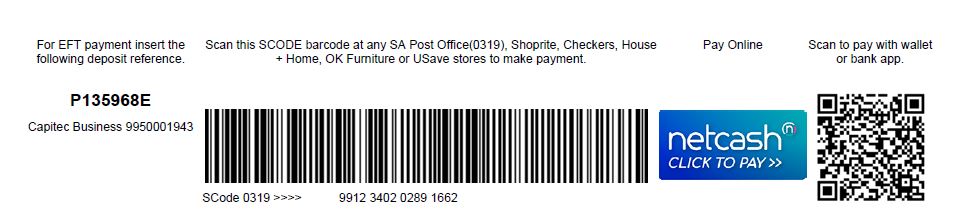
The P Number is automatically generated by Netcash and allocated to the invoice. It is unique to the invoice and is the reference number for the transaction
For EFTS payments, the customer will use this number as the payment reference number.
For the other payment options, this P[Number] will automatically be linked to the payment because it is embedded in the barcode, the Pay Now link and the QR Code.
Viewing your Pay Now report in Netcash
- Select Services > Pay Now
- Click on Reports > Processed Transactions.
- Choose the date range for the data that you require.
- By clicking on the icon to the left of the transaction, additional information is displayed.
- Reports can be downloaded in Excel (XLS button) or use the Download button for a PDF version of the report.
Need more assistance?
Contact your Relationship Consultant on 0861 338 338 or email us on support@netcash.co.za
