SimplePay
SimplePay salary batch uploads to Netcash.
Activating Netcash service keys
The service key settings allow you to generate your service keys if this has not been done prior, or if it has already been generated, you are able to view it here. You are also able to edit the email address or deactivate the service key.
Salary payments key
Navigate to Netcash > Account profile> NetConnector > Salary payments.
- Complete the required fields.
- Tick the postback URL active box if required.
- Select the pre-defined postback URL if your software appears in the dropdown list or Insert the postback URL where the responses should be electronically sent.
- Choose from the following options: Ignore errors, auto forward action date, or Lock batch on upload. (See notes below for detail).
- Click on the Submit button.
- The service key is generated and active.
Note:
- Select Ignore errors if you would like Netcash to process payments to valid bank accounts and ignore invalid bank accounts. Leaving this option unticked will result in all payments rejecting if any one payment is invalid.
- Auto forward action date will move your payments to the next valid action date if you have missed your cutoff time.
- Lock batch on upload will not allow any editing of salary details once the supplier batch is sent to Netcash.
API Keys and Company Linking
API key(s) are essential for setting up your integration with Netcash and identifying which companies are linked for salary batch uploads.
Important: When multiple companies are linked to an API key, all Netcash users with salary access will be able to view those companies salary batches. If you would like to keep salary information for other companies separate, we recommend the following:
- Create a separate API key for each company.
- Use a Netcash sub-account for importing salary batches for each individual company.
This approach ensures better access control and separation of company data.
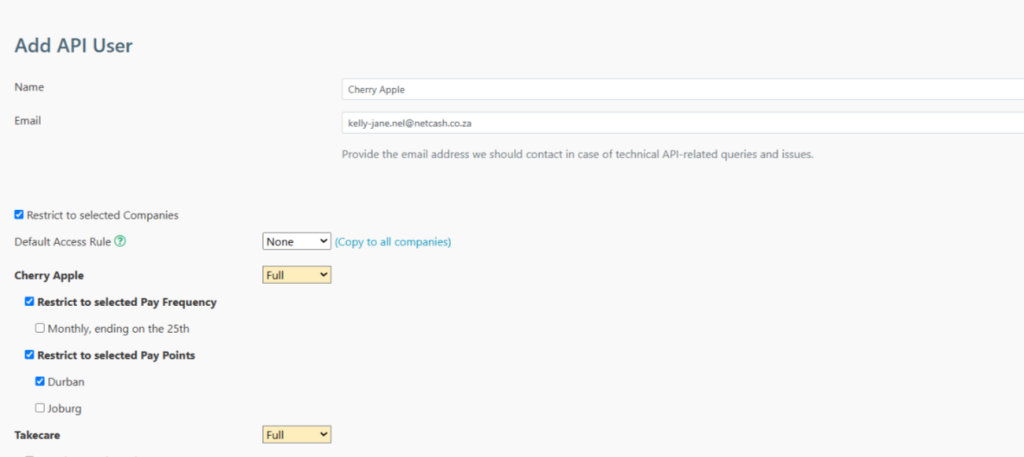
Navigate to SimplePay > Man icon top right > Manage Users > API Users
- Click on Add to create a new API user.
- Create an API User name (E.g. Company name)
- Insert your email address.
- Select Restrict to selected Companies.
Note the access (Full, Read only and None) if full is selected any future companies, payruns and pay points added in SimplePay will automatically be linked to this API key - Select the company or companies as well as the pay runs and pay points that you would like to link to an API key.
- Any companies listed that you do not want to link to the API key change the access to none.
- Click on save.
- The API key will be displayed at the top of the screen.
- Save the API key.
- This API key is to be inserted into your Netcash account in the next step.

- Click on the pencil icon if you would like to regenerate the API key.
- Delete: A company cannot be removed from an API key once created. The API key/ user can be deleted, recreated and linked.

Repeat the process if you would like to create an additional API key/s for another company.
Netcash SimplePay setup
Navigate to Netcash > Apps > SimplePay > Setup
Note: If the SimplePay icon is not visible under the App menu, permissions need to be set. Navigate to Account profile – System users > Manage system users > select the user > Select the App menu and apply permissions.
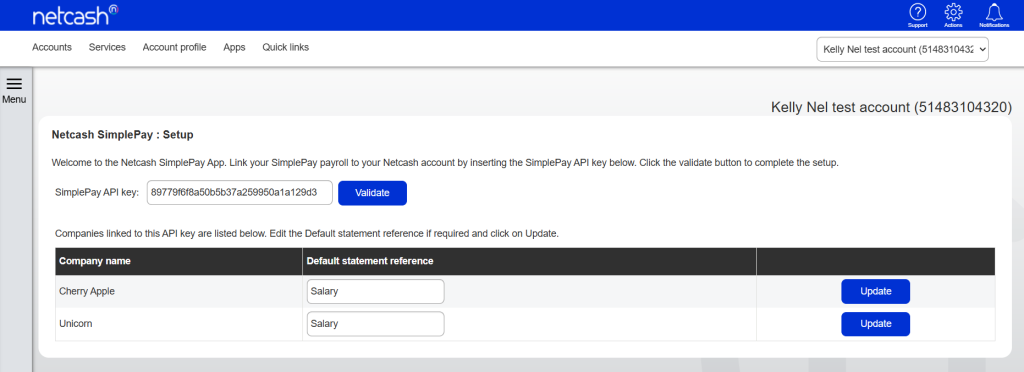
- Select the setup menu.
- Insert your SimplePay API key.
- Click on validate.
- Companies linked to this API key are listed below.
- Edit the Default statement reference if required and click on Update.
If you have additional API keys proceed to add the SimplePay API key to the relevant sub account/s
Netcash SimplePay: Validate employees
Navigate to Netcash > Apps > SimplePay > Validate employees
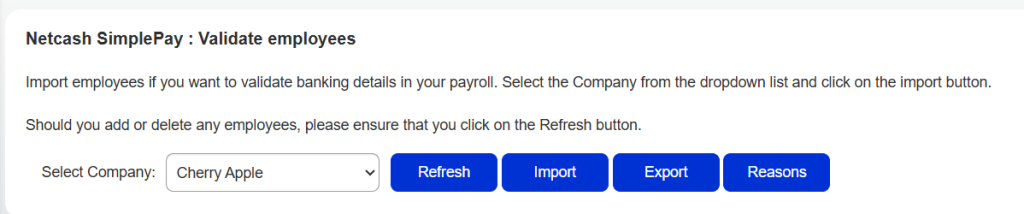
- Click on the validate employee’s menu.
- Select the Company from the dropdown list and click on the import button.
- Employees will be displayed below with their bank account validation status.
Note: only employees that are set to Payment method EFT will be imported and validated
- Click on export if you would like to view the validation results in Excel
- Invalid bank accounts will be displayed in red and must be corrected in payroll and revalidated.
- Click on reasons to view status and descriptions for invalid bank accounts
- Repeat the validation if there are any additional companies.
- Should you add or delete any employees, please ensure that you click on the Refresh button
Netcash Validation tool
Navigate to Netcash > Apps> Validation tool > Validate Bank account
- Add a bank account number
- Select the generic branch code or alternatively add your own branch code
- Click on submit
- A validation status will be displayed with either a valid or an invalid bank account.
Netcash SimplePay: Process payruns
Navigate to Netcash > Apps > SimplePay > process payruns
- Select the Process payruns menu
- Select the Company and Payrun from the dropdown list and click on the Import button.
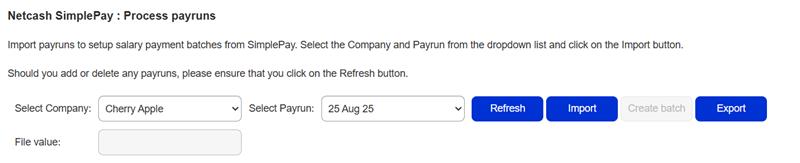
- A list of employees and the individual payment amounts will be displayed.
- The batch total is displayed.
- Note: only employees that are set to Payment method EFT will be imported.
- Click on create batch if you are ready to proceed with the salary batch upload.
- Should you add or delete any payruns, please ensure that you click on the Refresh button

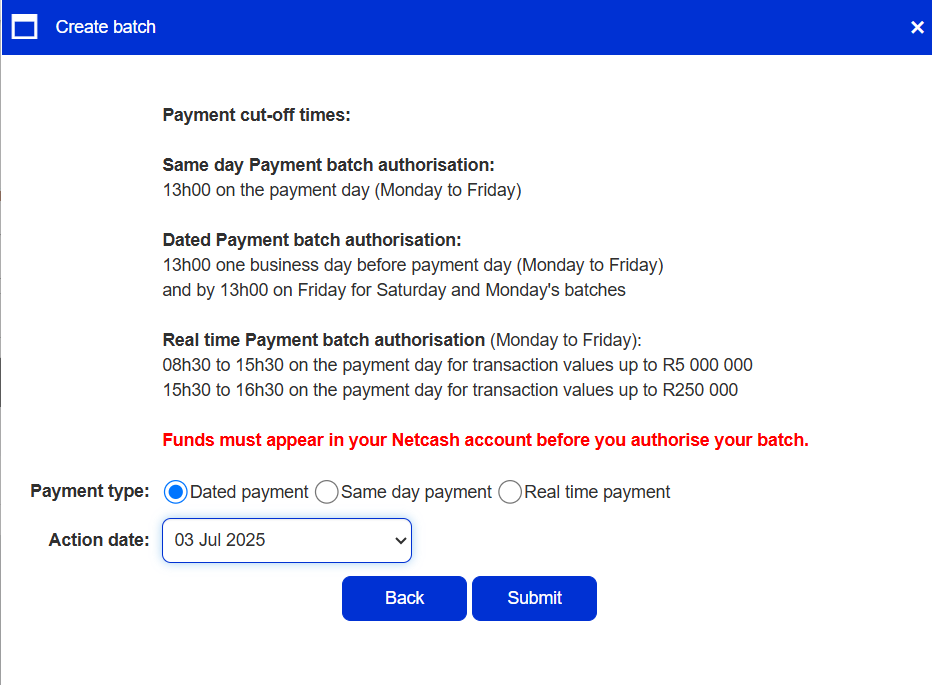
- Select the payment type
- Select the action date
- Click on submit
- Your salary batch has been successfully created and is now awaiting authorisation
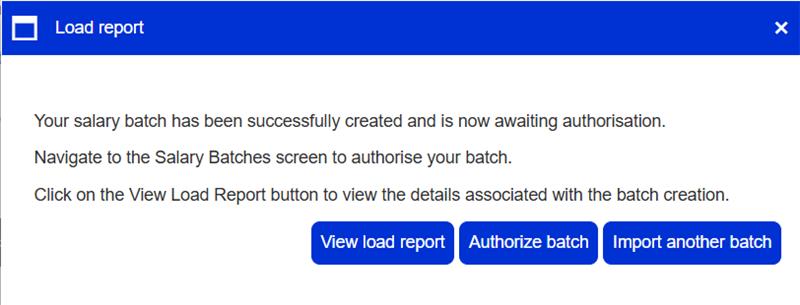
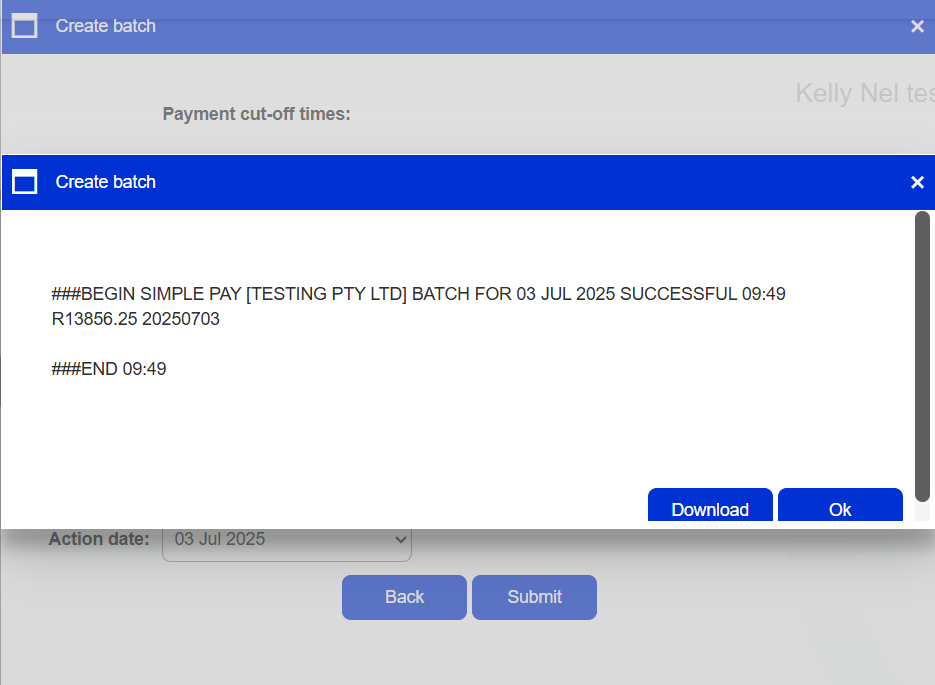
- Click on the View Load Report button to view the details associated with the batch creation
- Alternatively import another batch
- Click on ok
Authorising a salary batch
Navigate to Netcash >Services > Payments > Salaries > Salary batches.

- The list of salary batches will be displayed.
- Click the Authorise button next to the batch that you would like to process.
- The confirm batch authorisation screen is displayed. This is a summary of the salary batch including charges, notifications and a choice of funding options:
– Use the available balance if there is sufficient credit in your Netcash account.
– Will make a bank transfers if you need to fund the Netcash clearing account for payment.
- Read and accept the terms and conditions, then click on Authorise
