Sage 300 People


Service Keys are a vital part of system security and should be treated with the utmost confidentiality.
Sage 300 People Payroll & HR requires 3 service keys:
Click on Account Profile > NetConnector.
Three keys will have to be activated.
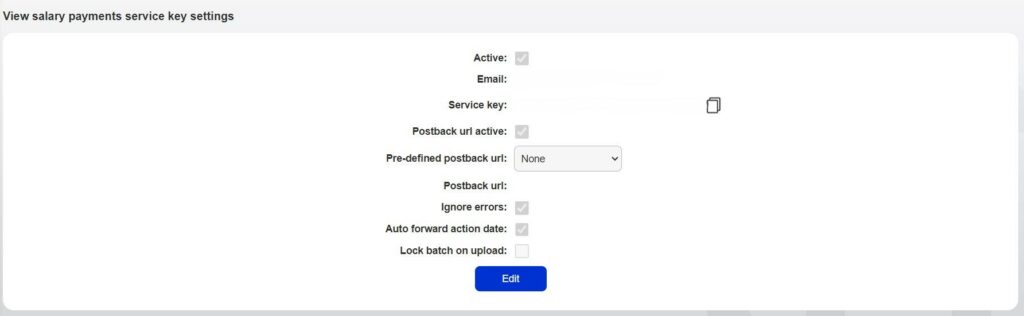
Click on salary payments and once the following steps have been done. Repeat for creditor payments, risk reports and account service.
Insert an email address to receive notifications.
Tick Postback URL active box.
The predefined URL dropdown menu must be set to Sage VIP Payroll.
The Statement download option is set to none.
Choose from the following options: Ignore errors, Auto forward action date or Lock batch on upload.
Click on the Submit button.
The service key is generated and emailed to the email address linked to the service key.
4. These four service keys are to be inserted into your payroll.
5. Log into your 300 People Payroll account.
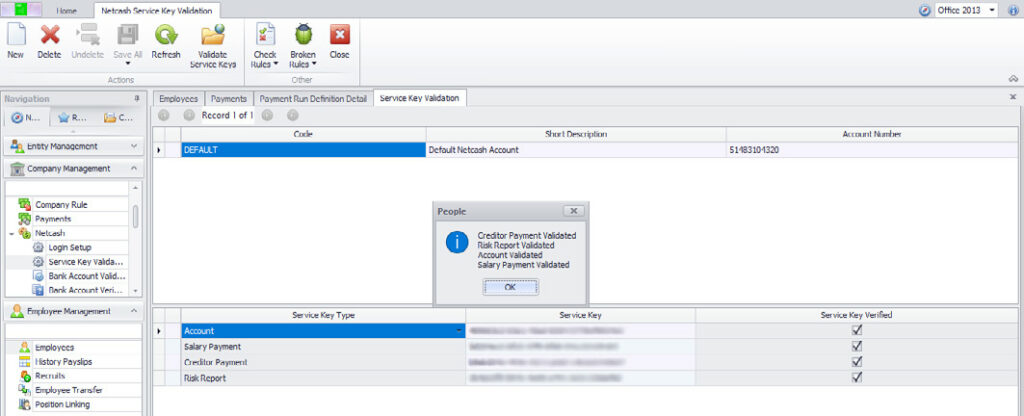
6. Click on Company Management > Netcash > Service key validation.
7. Insert the keys and add your Netcash account number. (this can be found on the top right corner in your Netcash account)
Note: The risk reports key is optional and may be added if bank account verifications are required. Please note that bank account verifications are billable.
8. Then click on Validate service keys. Once validated the four tick boxes will be ticked.
9. Click on save all.
1. Validations of the company rules are to be done before any verifications or batch exports.
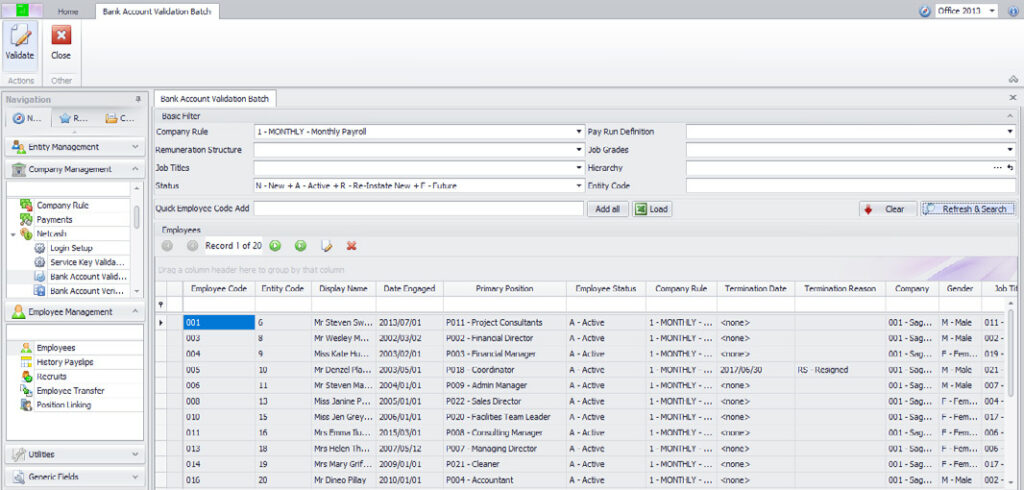
2. In payroll select Company Management > Netcash > Bank account validation.
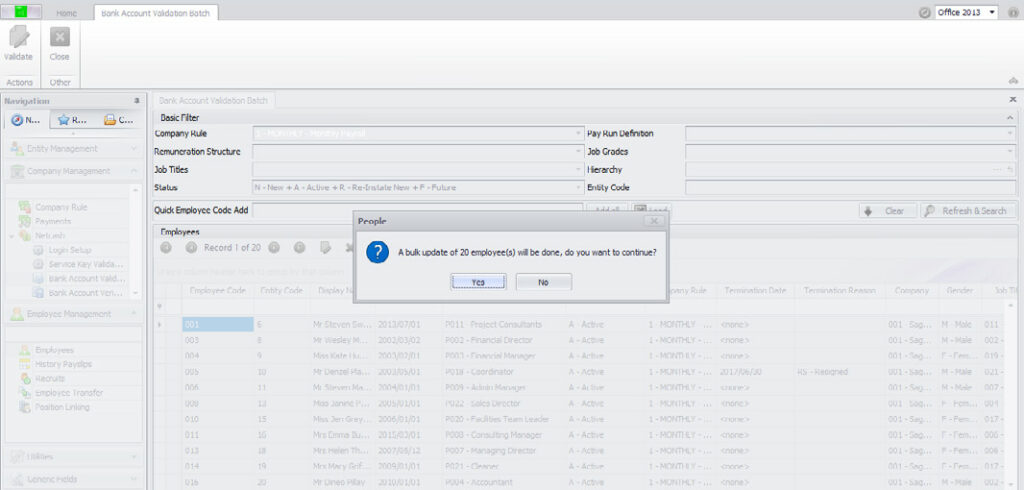
3. Click on Validate. The system will run a bulk validation on the company rule.
4. Once the validation has been done the system will provide you with a breakdown of any bank accounts that is invalid. These bank accounts can then be amended before verification.
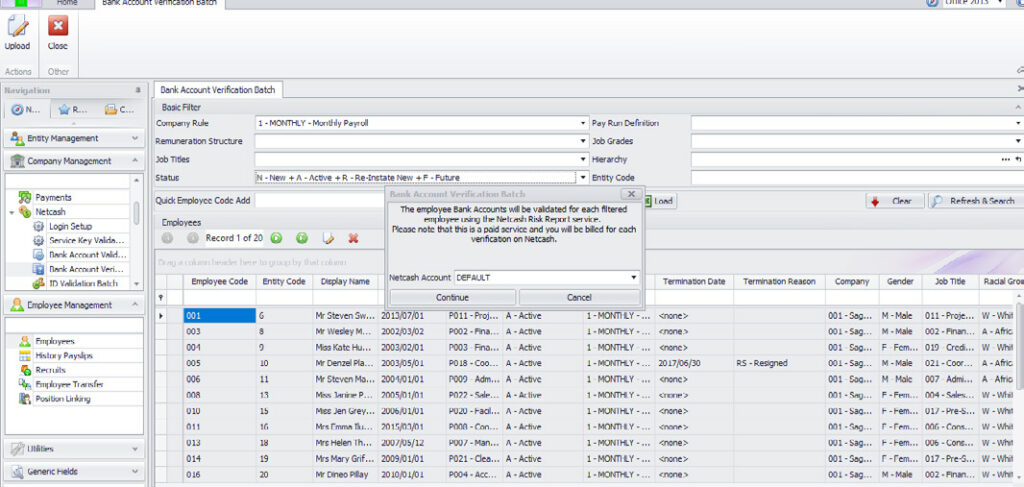
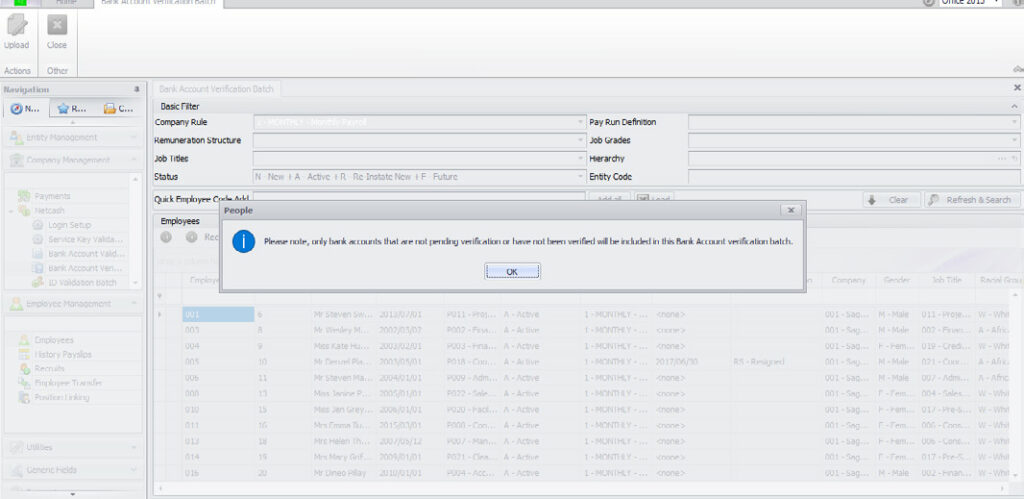
1. In payroll select Company Management > Netcash > Bank account verification.
Note: Bank account verifications are billable.
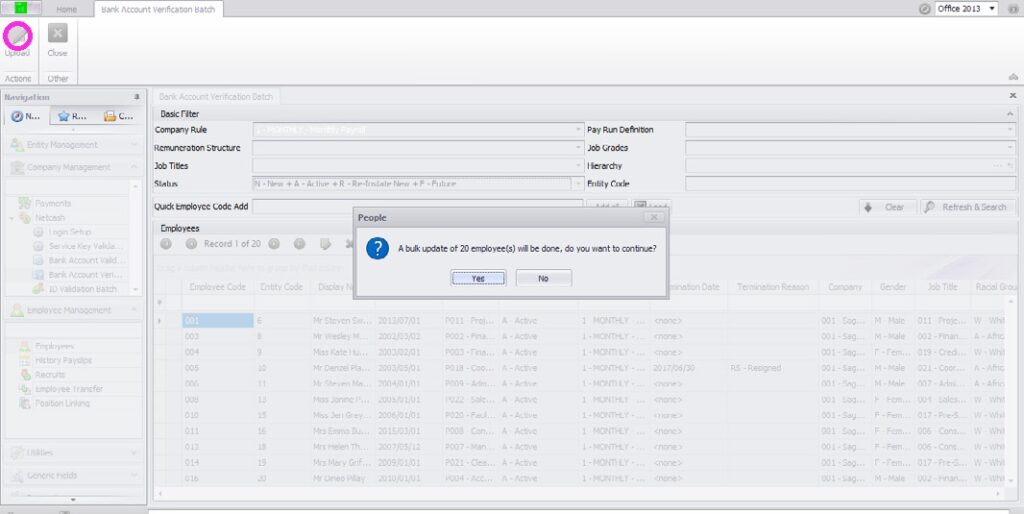
2. Select Upload.
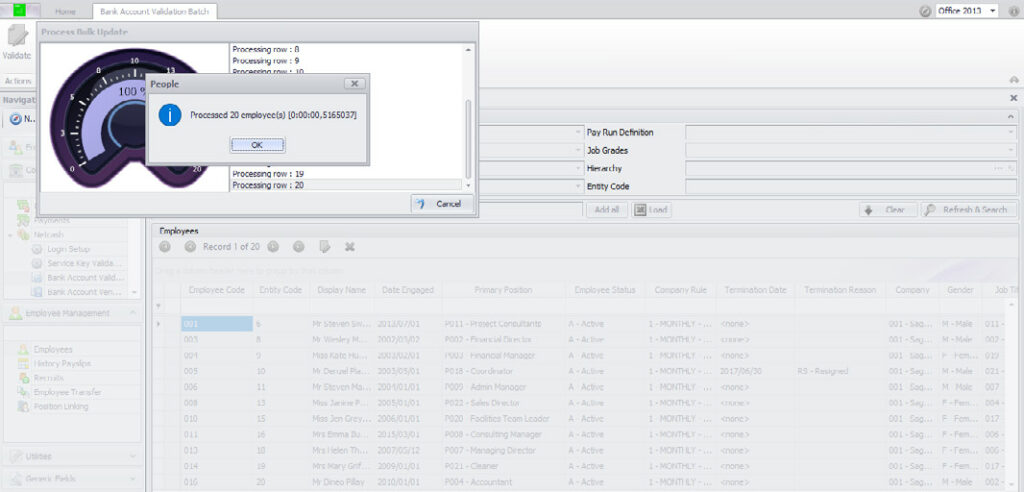
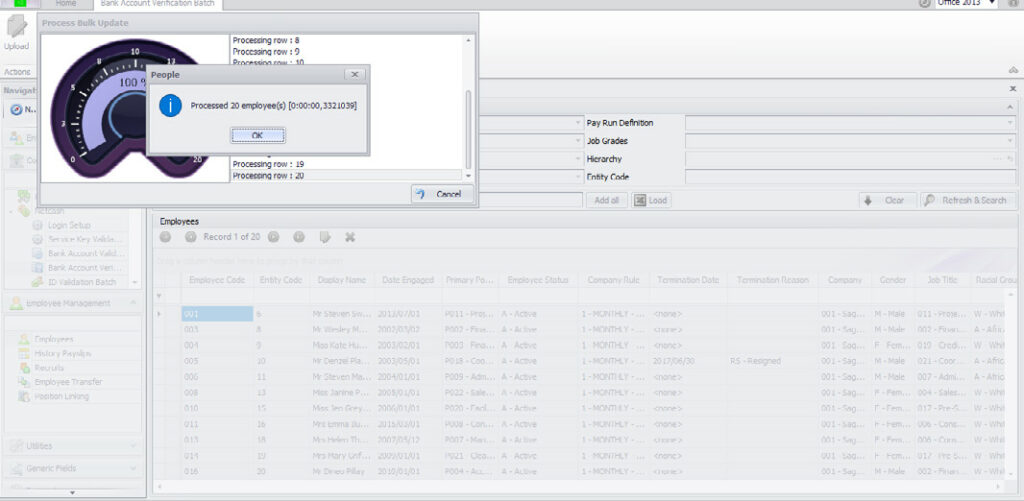
3. The system will now process all the bank accounts and run a verification.
4. The system will notify you once the verifications have been completed.
5. Select your Netcash account and continue.
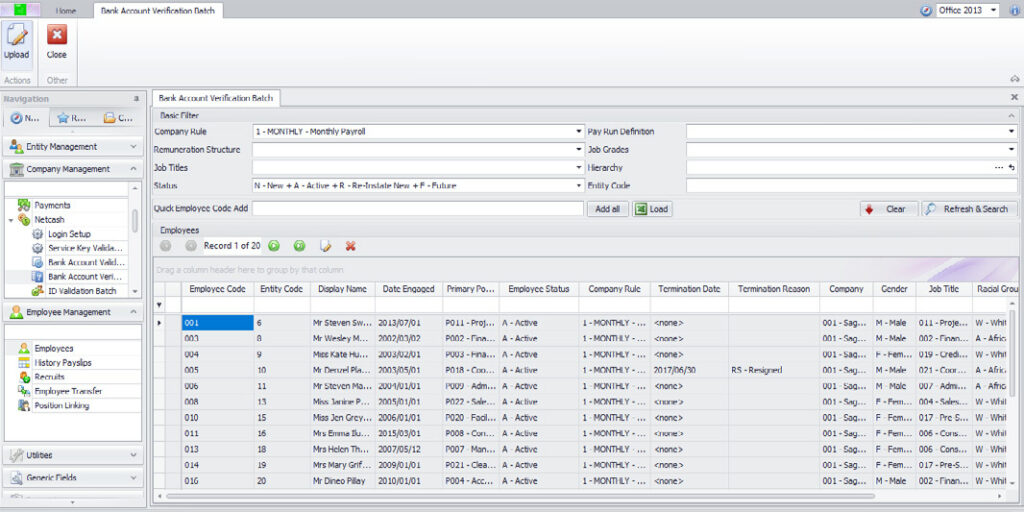
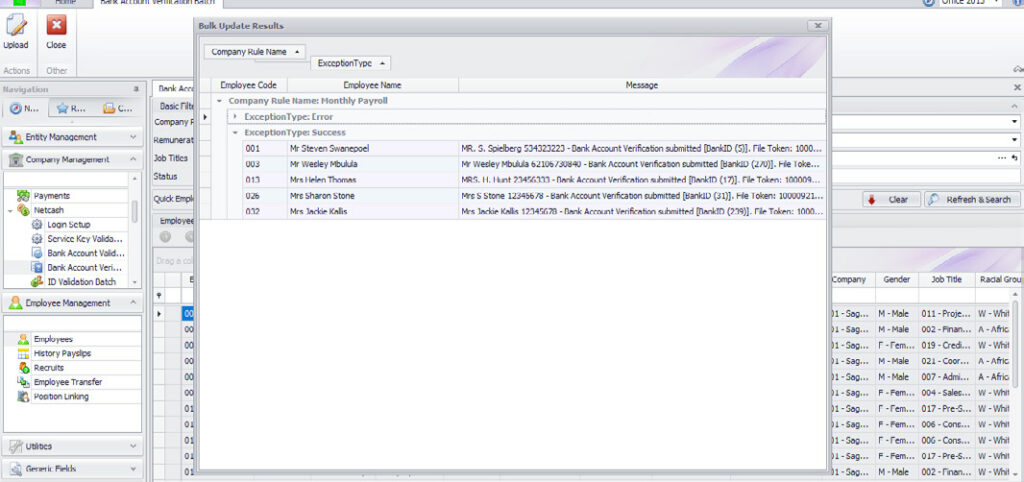
6. The system will then display the bank accounts that have been sent to Netcash for verification.
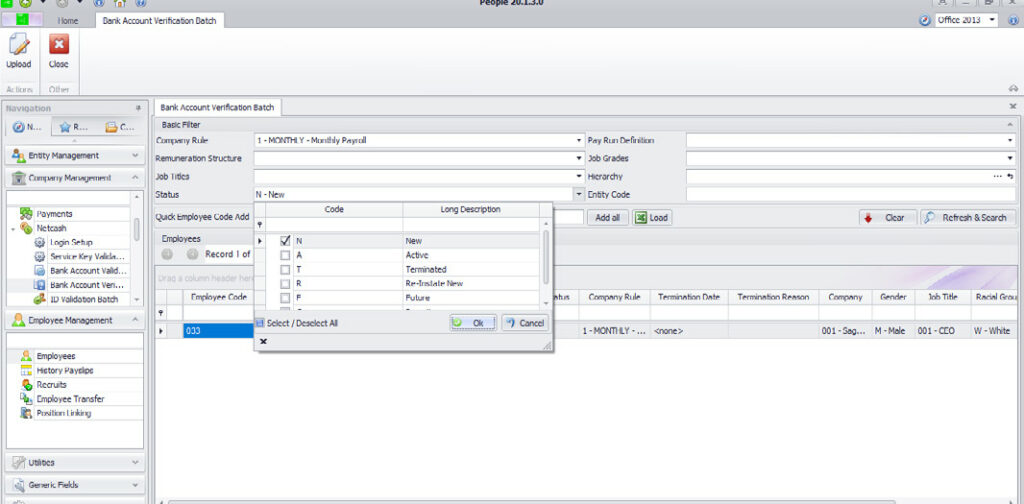
7. For future verifications on any new or change of any bank details, the same process can be followed on the payroll. The system will then verify new or changed bank accounts.
8. In payroll select Company Management > Netcash > Bank account verification.
9. To view the verification report on Netcash, log into your Netcash account.
10. Click on Services > Risk reports > Reports > AVS.
11. Once verified the status will be returned and will be able to view each verification report.
1. Once your payroll has been finalised, the batch can be exported to Netcash.
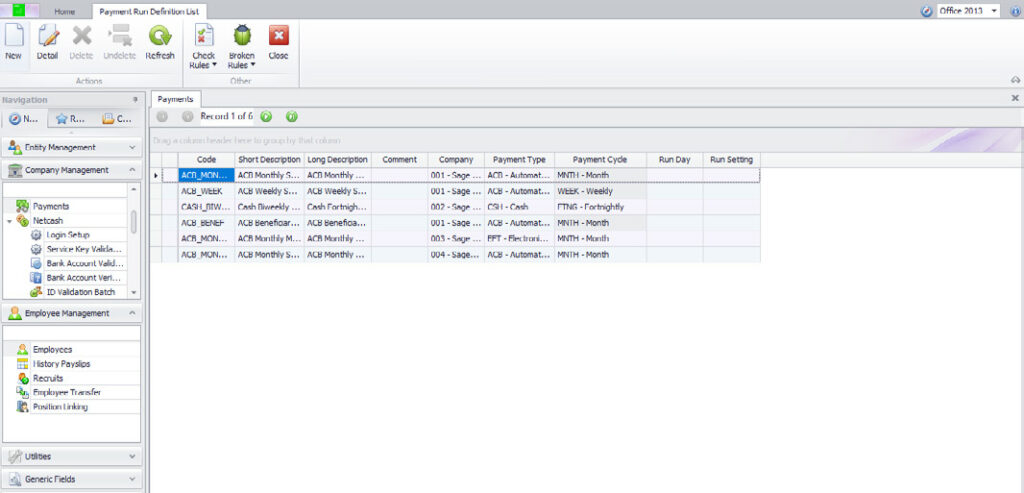
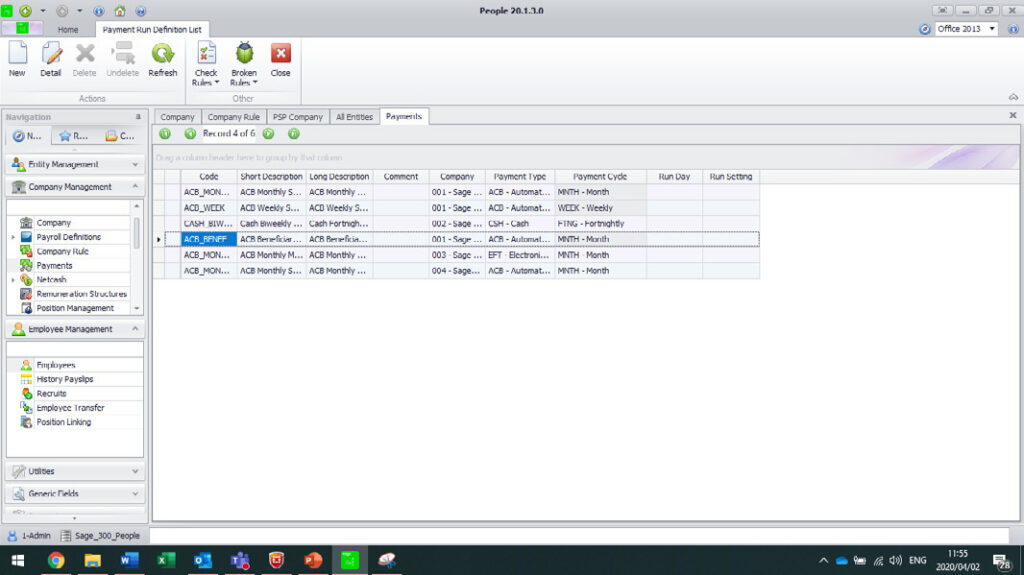
2. In the payroll select the following > Company management > Payments.
3. Select ACB.
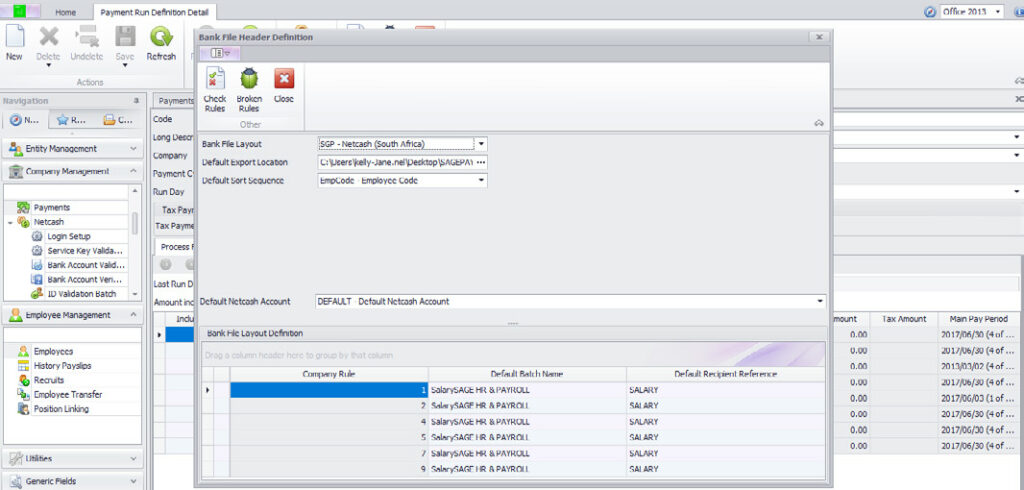
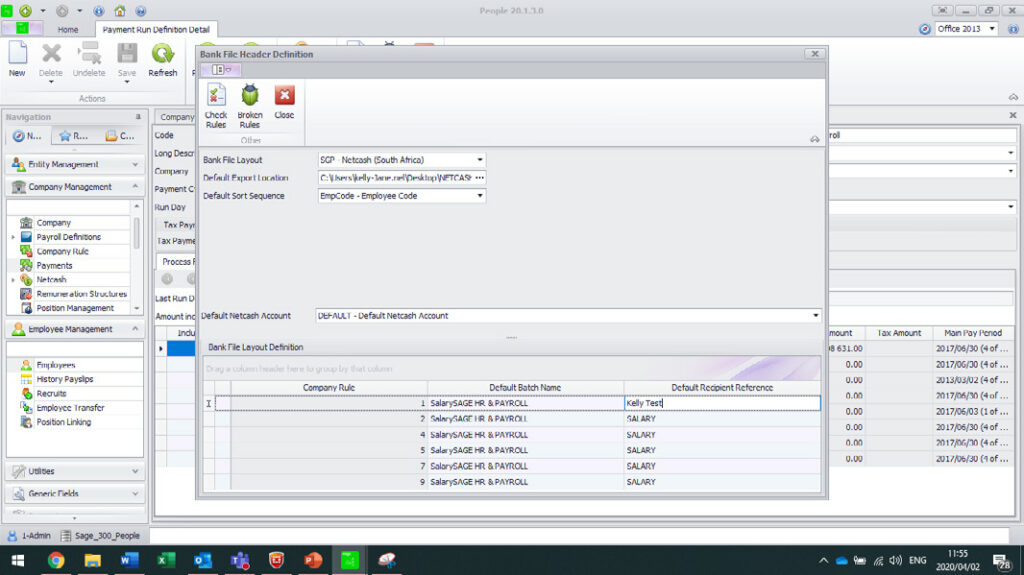
4. Select the Bank file header definition tab (this is a once-off setting).
5. Then Close.
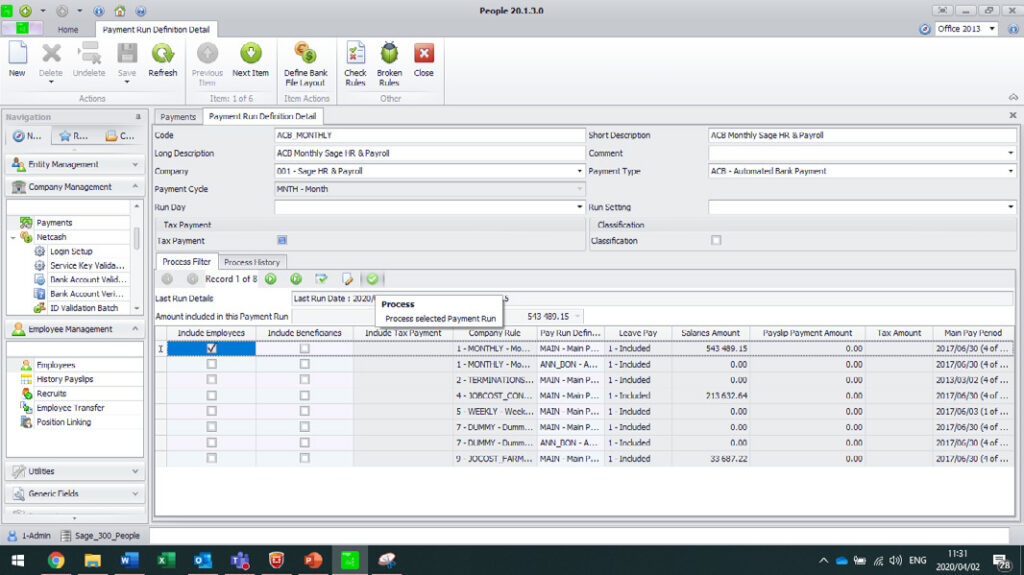
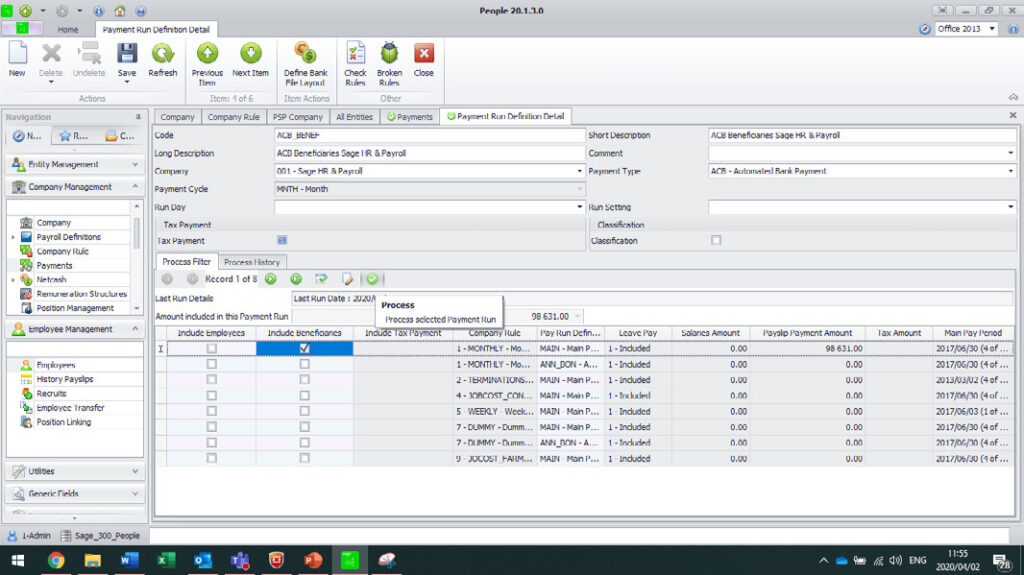
6. Select the Company rule and select Include employees.
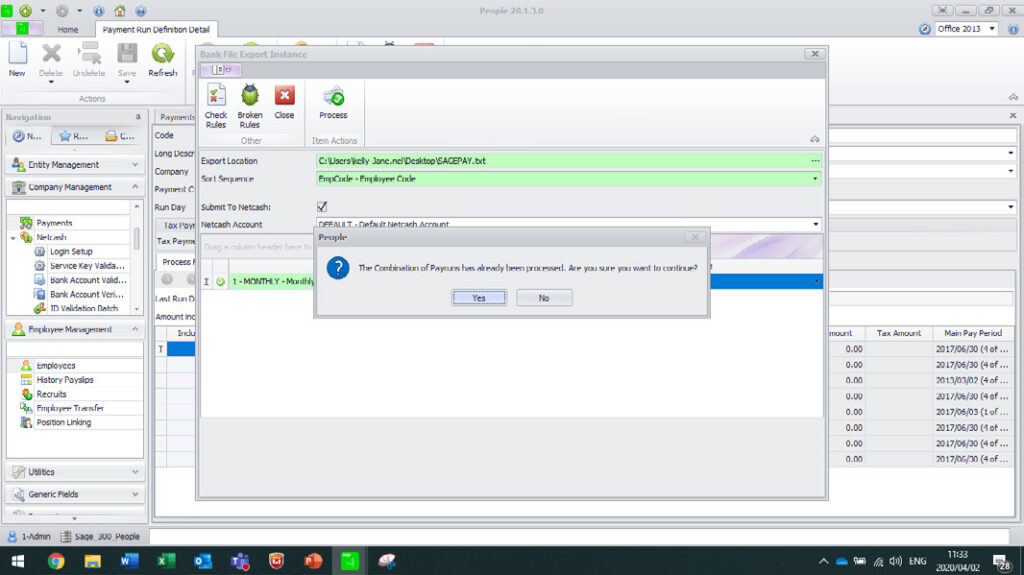
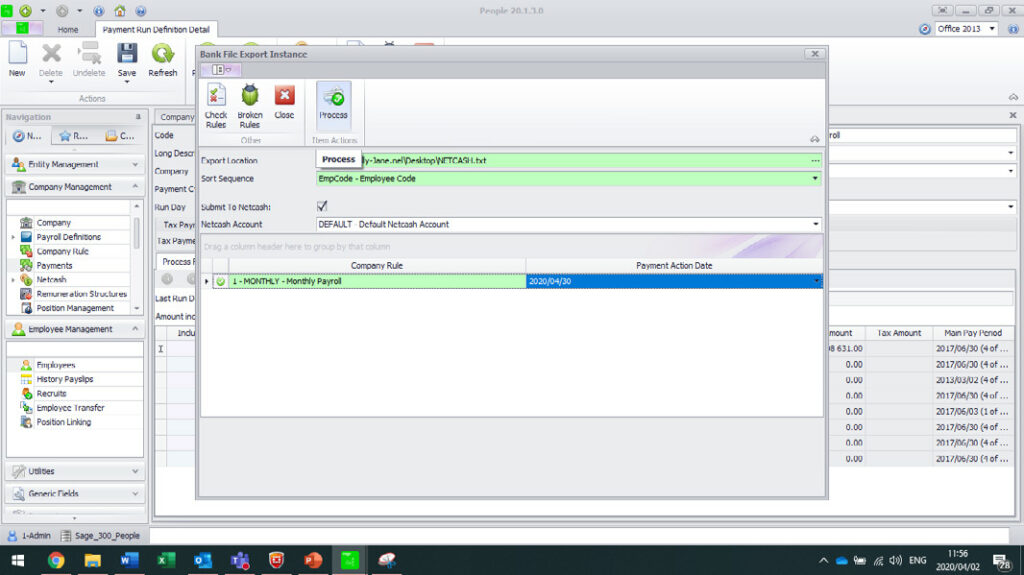
7. Then select Process.
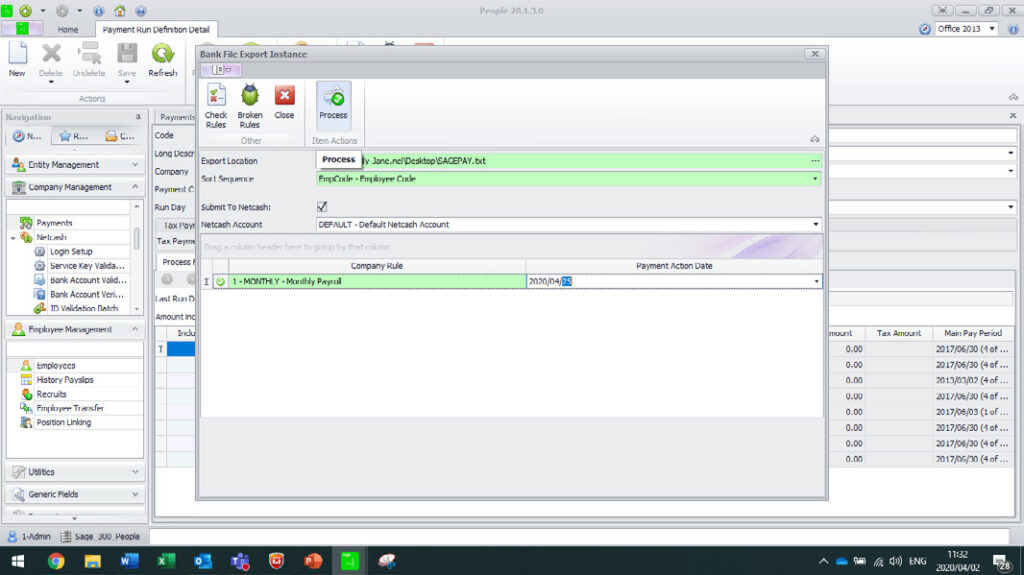
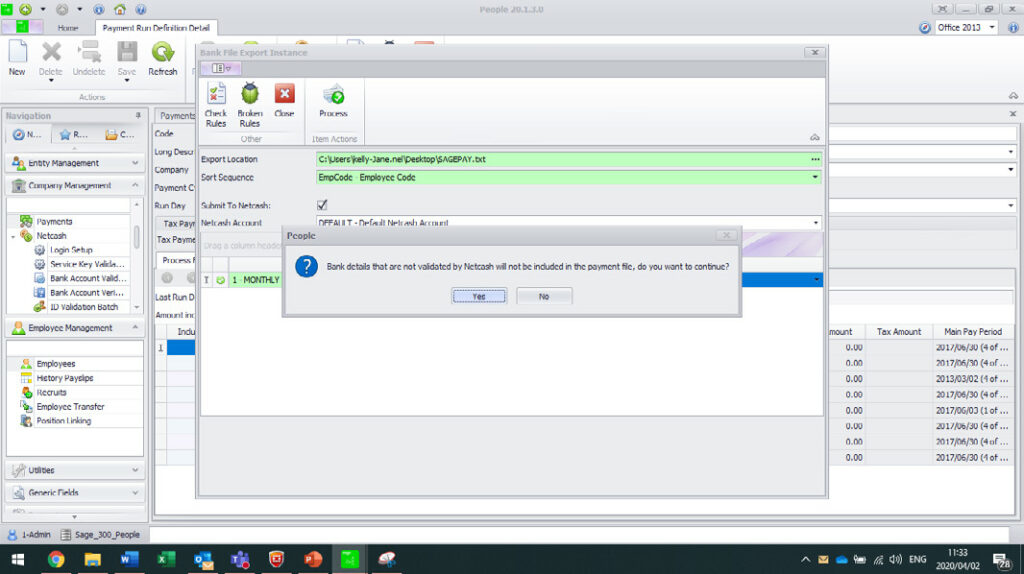
Tick the Submit to Netcash tab.
• Select the Payment date.
• Select Process.
8. Any bank account details that have not been validated by Netcash will be excluded from the batch and will be displayed on the 300 people batch report.
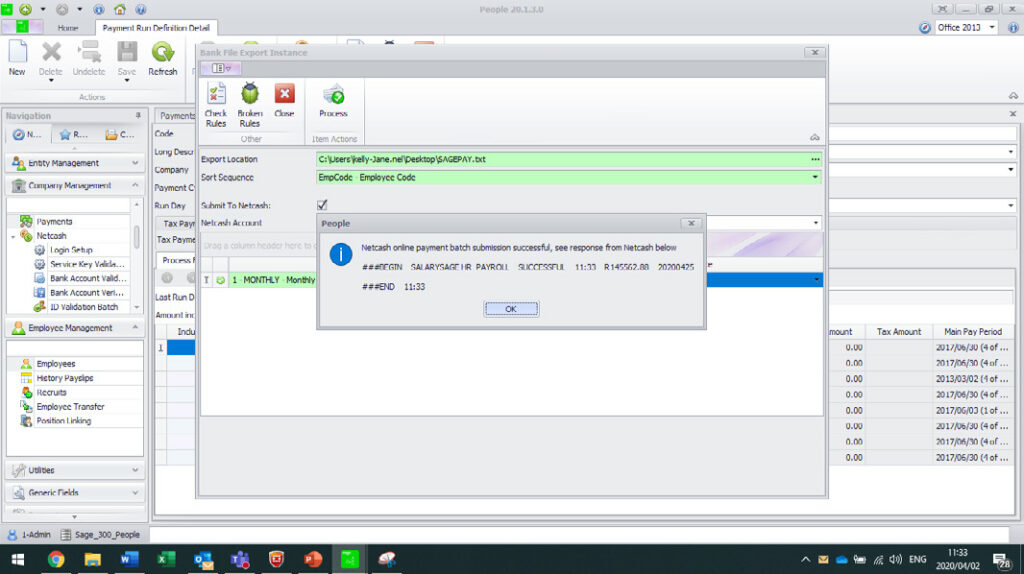
9. The batch has now been submitted to Netcash.
10. The upload report will be sent to the person’s email address which was added to the service key settings. Alternatively, it can be viewed on Netcash > Account Profile > Integration tools > Batch file upload report.
Select Services.
Click on Payments from the dropdown menu.
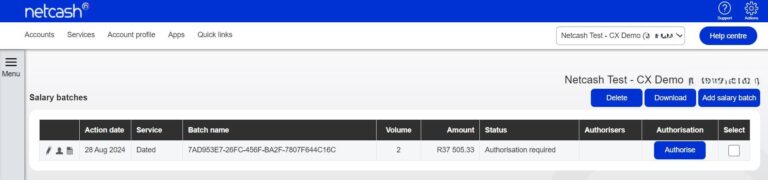
Click on Salaries > Salary batches.
The list of salary batches will now be displayed.
To download your pre-authorisation report, click on Edit Clients on the left side of the salary batch that you require the report.
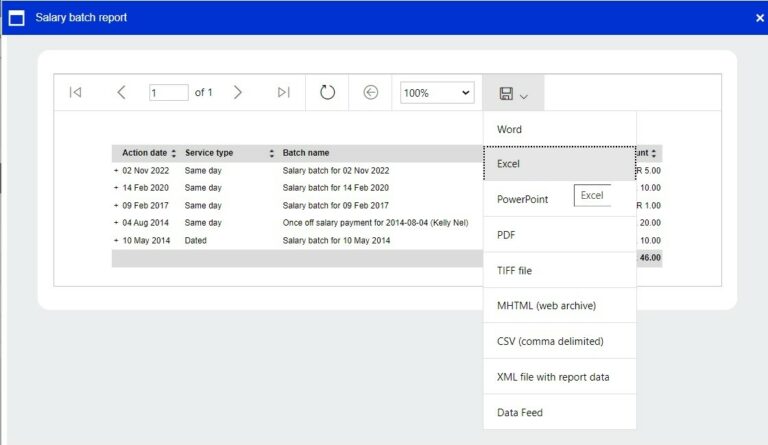
To download your salary batch report, click on the Download button above the right side of the table.
Your salary batch report will be displayed on the screen. Click on the Export icon and select the preferred format to download your report.
The batch will automatically start downloading and save in your default downloads folder.
Select Services.
Select Payments from the dropdown menu.
Click on Salaries > Salary batches.
The list of salary batches will be displayed.
Click the Authorise button next to the batch that you would like to process.
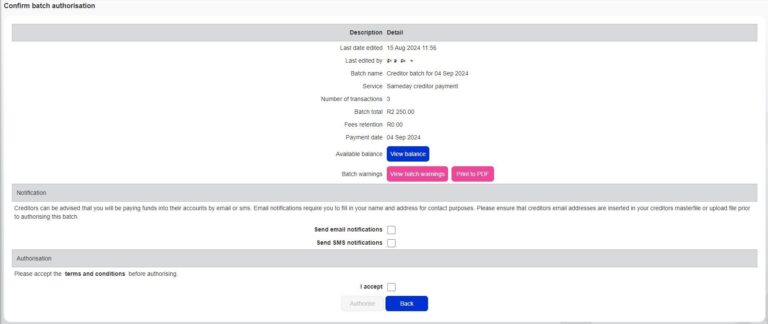
The confirm batch authorisation screen is displayed. This is a summary of the salary batch including charges,
notifications and a choice of funding options:
Batch warnings -A batch warning button displayed in pink indicates warnings in the batch. Batch warnings will display info in the batch such as duplicate bank accounts and account details changed. You can choose to make corrections or proceed to authorise the batch without amendments.
Use the available balance if there is sufficient credit in your Netcash account.
Transfer funds if you need to fund the Netcash clearing account for payment.
Read and accept the terms and conditions, then select Authorise.
Should you select to pay using the Available balance option you will then be re-directed to the Confirm batch authorisations screen.
Insert the One Time Pin (OTP) sent to your cell number or Google authenticator pin.
Click OK.
Your salary batch is now authorised and will be scheduled to run on the selected date.
If you require additional authorises, the batch will be awaiting further authorisation – please inform the additional authorisers of this.
If you are paying using the Transfer funds option, you will be prompted to insert the following information:
The date when the transfer will be made.
The Netcash account you will be transferring to.
The amount to be transferred.
The extra fields are optional for reconciliation purposes.
Select Next.
Click on Print Report in order to obtain details of the Netcash clearing that you need to fund. Please ensure your transfer has the correct reference.
Click Authorise to confirm your bank transfer.
Insert the One Time Pin (OTP) sent to your cell number or Google authenticator pin.
Your Salary Batch is now authorised and will be scheduled to run on the selected date.
If you require additional authorises, the batch will be awaiting further authorisation – please inform the additional authorisers of this.
One Time Pins are session-based, which means that as long as you are logged in to your Netcash account, you can use the same OTP to authorise. Where multiple authorisations are required, only the first authoriser needs to insert the OTP.
To obtain your post-batch authorisation report click on Services.
Click on Payments from the dropdown menu.
Click on Salaries > Salary batch reports.
The list of salary batches will now be displayed.
To download your Post-Authorisation Report, click on the printer on the left side of the Salary Batch report
Click on the Export icon.
Select your preferred format to download your report.
The batch will automatically start downloading and save in your default downloads folder.
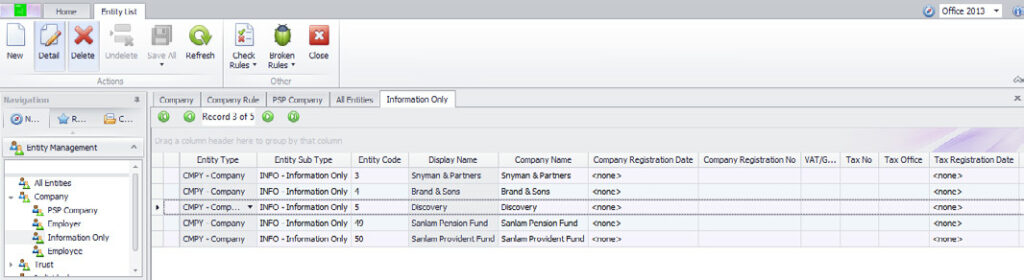
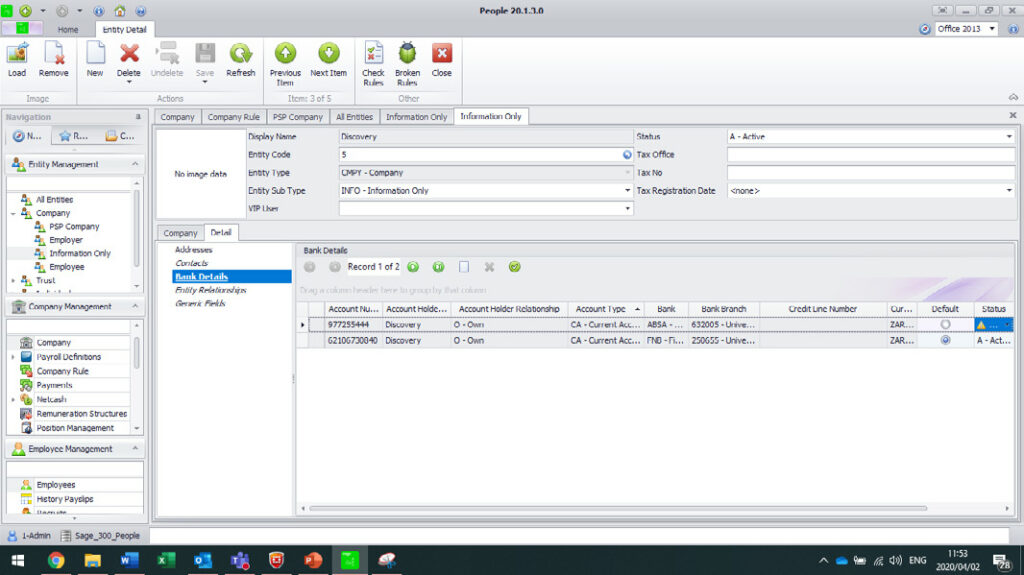
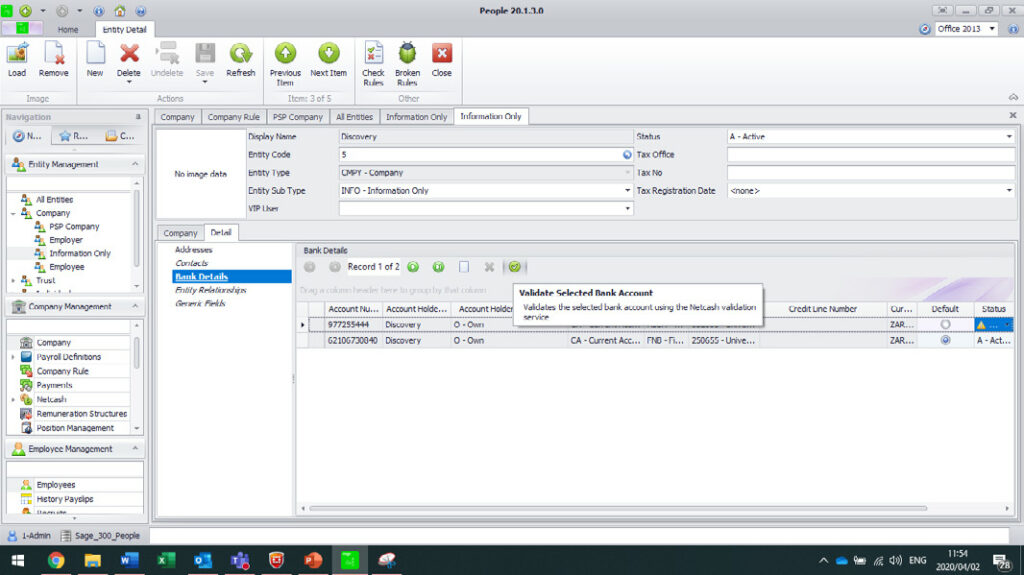
1. All bank accounts for third parties need to be added individually and validated on the bank details tab on the entity.
2. Select Entity Management > Entity.
3. Add the banking details and validate the bank details.
4. Once bank accounts have been validated the third-party batch can be exported.
5. Select company Management > Payments.
6. Select beneficiary ACB.
7. Create the bank file layout as was done for the net pay exports.
8. Then Close.
9. Select Include beneficiaries.
10. Then Process.
Tick the Submit to Netcash tab.
• Select the Payment date.
• Select Process.
11. The beneficiary batch has now been set Netcash.
12. Log into your Netcash to view and authorise the salary batch.
14. The batch will display the action date, service type, volume amount and status. The batch breakdown can also be viewed by clicking on the man icon.
15. Once ready the batch can be authorised.
16. An OTP will be sent to the user that is logged into the Netcash account and has clicked on the authorise button. (depending on permissions that have been assigned to this user).
Contact your Relationship Consultant on 0861 338 338 or email us on support@netcash.co.za
