Xero App


Netcash has developed an application that allows your Xero software to connect with your Netcash account. The App allows for the following services to be automated:
Supplier/creditor payments – create supplier payments and send batch payments directly to your Netcash account.
Invoice receipts – create invoices in Xero with payment links to accept payments via the Netcash payment gateway.
Statement downloads allow for automated reconciliation of all transactions daily.
If you are using your Netcash Pay Now facility with any other integrated software and would like to use Xero Billing, please note that the Xero App will overwrite existing Accept, Decline and Notify Urls set in the service key if you tick the Pay Now Box on login. Should you not require this, we suggest that a sub account be opened on Netcash specifically for Xero Billing.
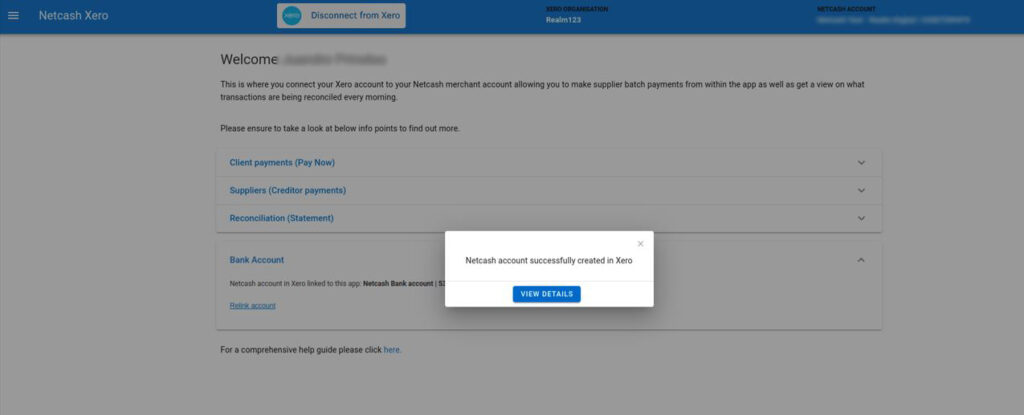
The accounts are now linked and you will be directed to the landing page.
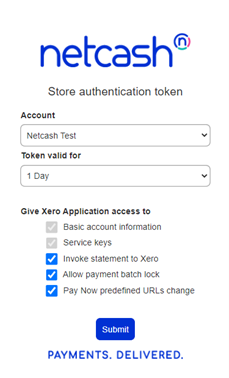
Note: In the ‘Store Authentication Token’ process, the Netcash Xero app will allow the following to be setup:
To log out of the Netcash account connected to the App, click on the Door icon on the top right of the screen. To log out of the Xero Organisation connected to the App, click on Disconnect from Xero.
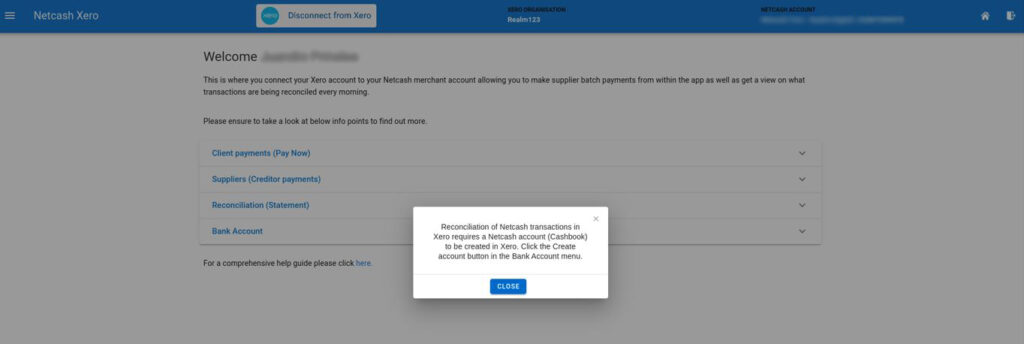
Reconciliation of Netcash transactions in Xero requires a Netcash bank account (Cashbook) to be created in Xero.
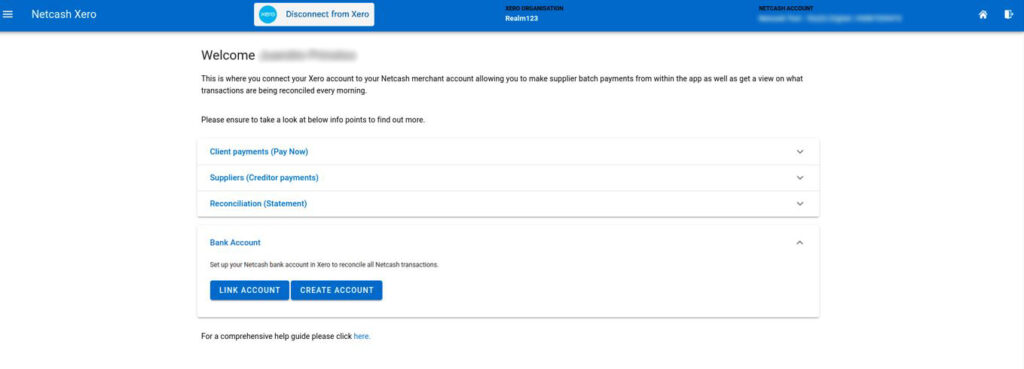
Select create account or alternatively select link account if you already have a Netcash account created in Xero.
Note – To relink an alternative account, select the relink option in the bank account tab.
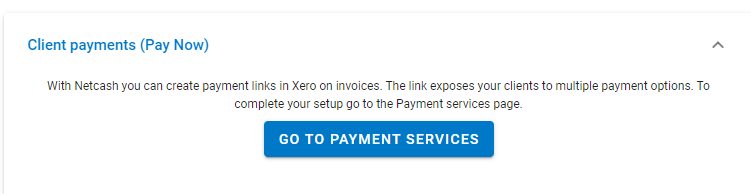
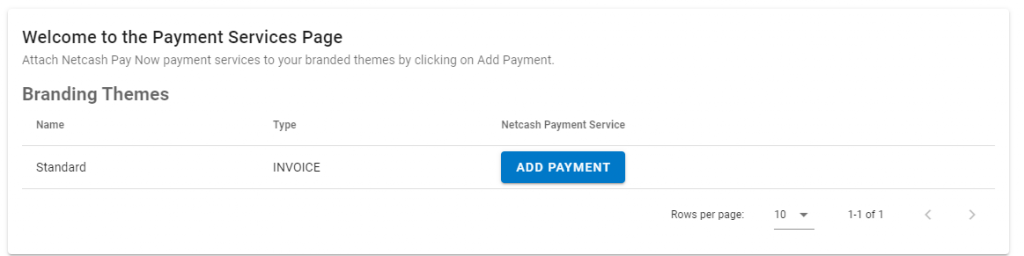
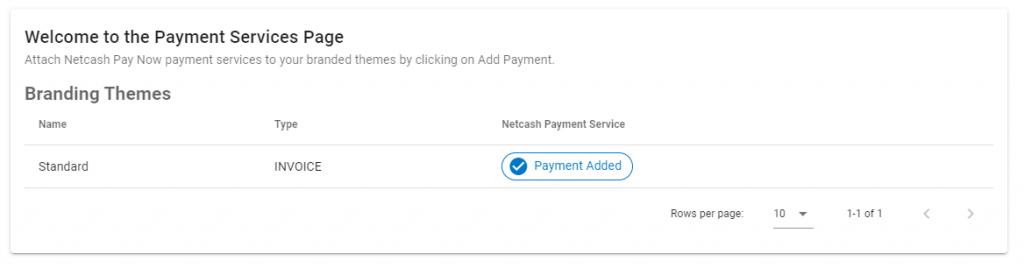
On the landing page of the Netcash app, expand the customer payments – (Pay Now) container.
Click on ADD PAYMENT
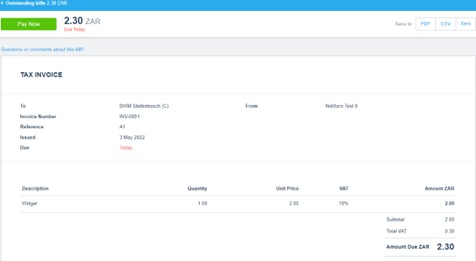
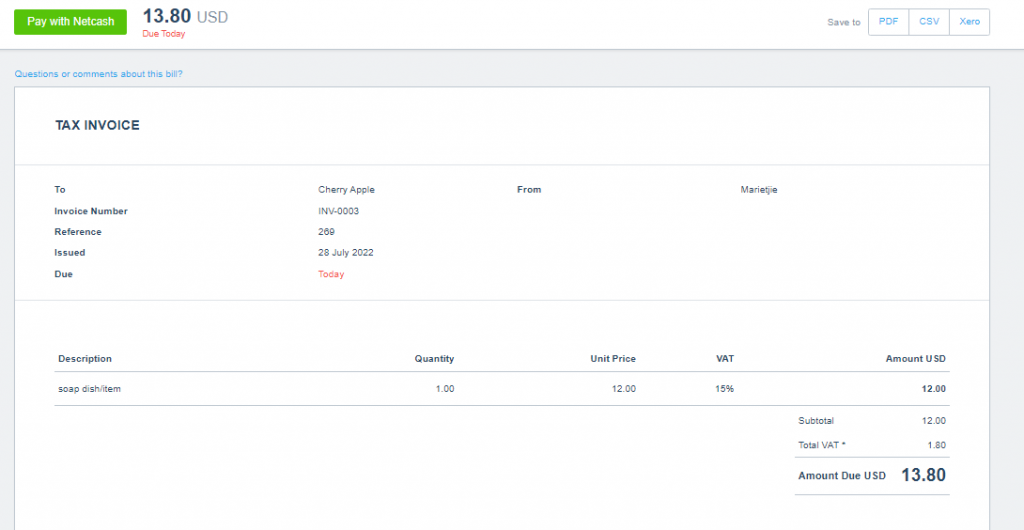
Click on the Business tab in Xero, go to Invoices, select the invoice you want to send, select the email option at the top, fill in the information and send the email. When the customer opens the email, they should click on Pay Now.
Click Pay Now and is redirected to the online invoice, clicking Pay Now then directs you to the Netcash eCommerce gateway to select a payment method and make the payment. Payments reflect on the Netcash statement the following business day for reconciliation.
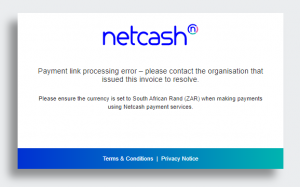
Note: Only invoices issued in South African Rands are payable through Pay Now.
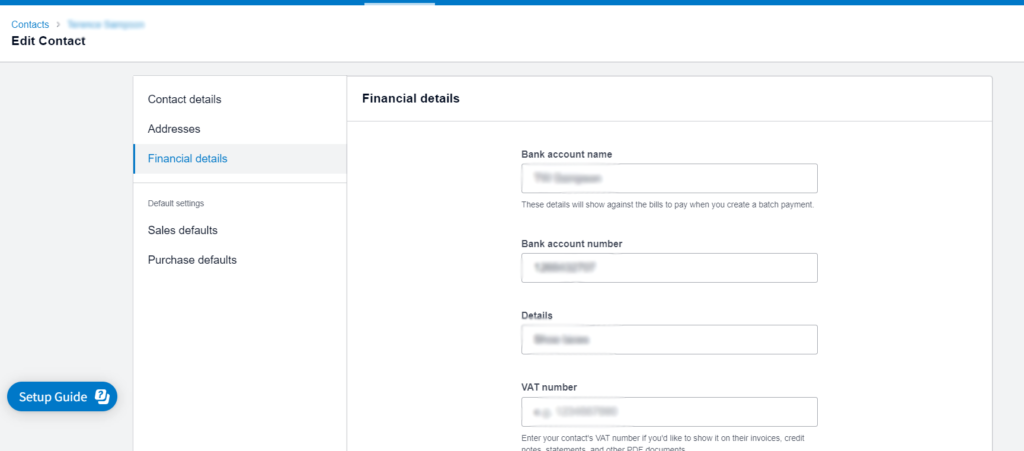
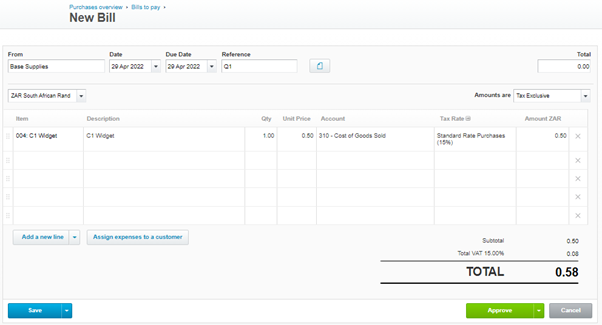
Ensure that all suppliers have banking details. Note that Xero does not cater for branch codes – these will be inserted in the Netcash Xero App.
The bill will now be sent to the Netcash Xero App for payment.
Login to the App.
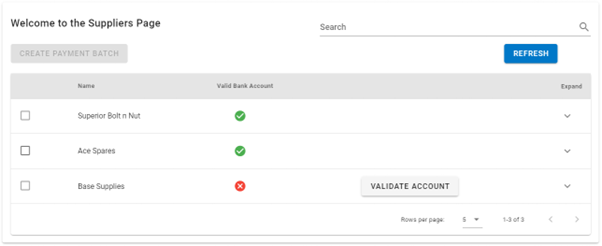
From the side menu select Suppliers.
Click on validate account ( for all new suppliers ).
Select the bank from the list of universal branch codes or slide the custom bank option and manually type in your branch code.
Click on Validate and check the top right corner of the screen for the result.
Invoices are grouped by the supplier, select the invoices that you would like to pay and click on CREATE PAYMENT BATCH.
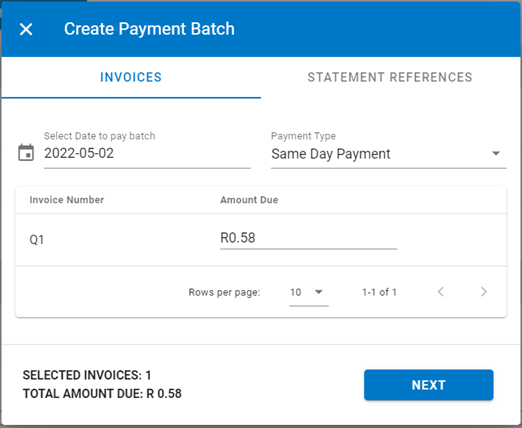
Select the date to pay batch and Payment type.
Edit amounts if you wish to part-pay invoices.
Click on NEXT.
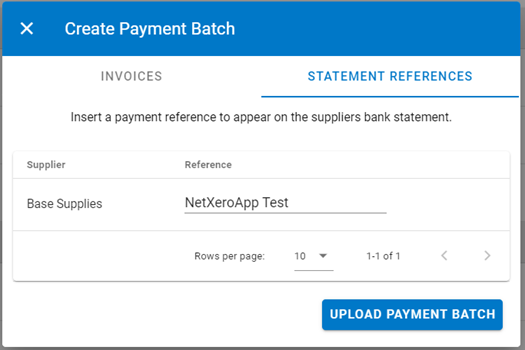
Click on Statement References to ensure the supplier receives the correct reference next to the payment on their bank statement. This field defaults to the Xero organisation name.
Click on UPLOAD PAYMENT BATCH to send the batch to Netcash.
The payment batch is now sent to Netcash, login to Netcash account to authorise the batch
Note: Batches are locked on upload by default – only action dates and service types can be edited. The refresh button will update the app with any recent supplier payments created in Xero. Suppliers and zero-value invoices will remain listed in the Supplier menu until they are processed via the Statement download /reconciliation function.
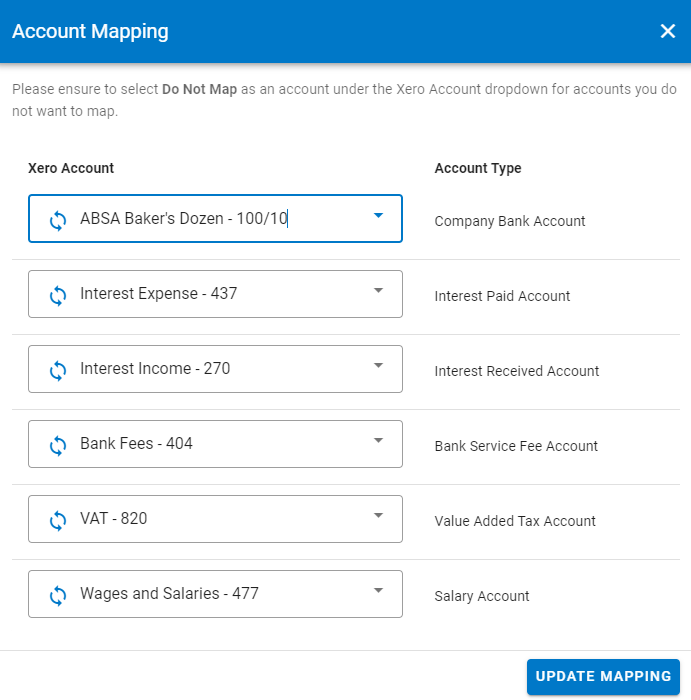
Note the ‘Do not map ‘option.
If salaries are being processed in the Netcash account that is linked to your Xero Netcash app, ensure that the mapping is done for the salaries under the Account mapping screen. This will result in a single consolidated transaction being displayed in Xero. Without salary mapping, individual salary transactions will be displayed in the Netcash bank account in Xero.
5. Save the mapping.
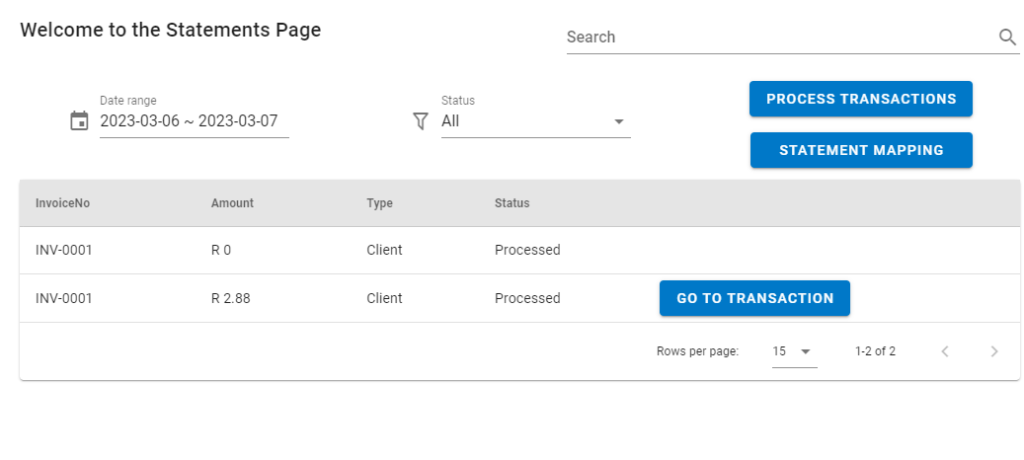
The Netcash Xero App will automatically retrieve your Netcash statement daily and post the transactions to the various Xero Ledger accounts. Note that supplier payments and customer payments are automatically mapped to the correct accounts and do not require manual mapping. Other transactions that did not originate from Xero but were processed through the Netcash system will be included in the daily automatic retrieval of your Netcash statement and posted to your reconciliations Tab to be reconciled.
Notes:
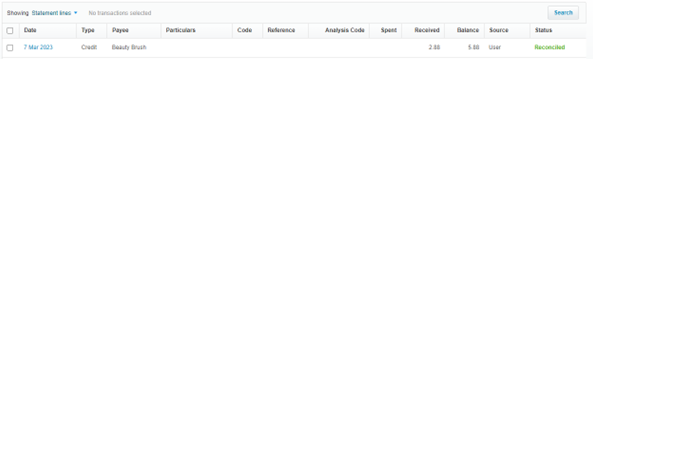
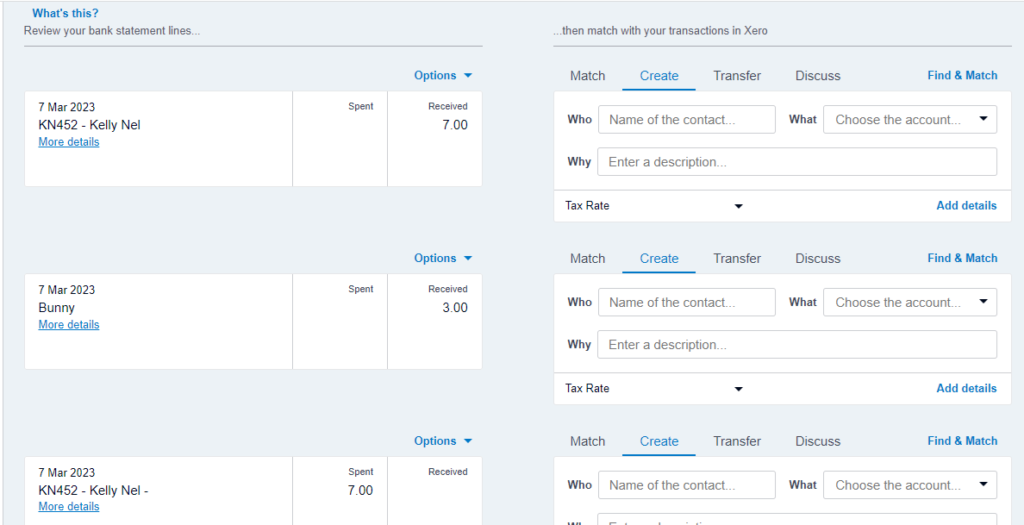
All unreconciled transactions can be viewed and reconciled in the Cashbook created for your Netcash account.
